강의 홍보
개요
- 데이터를 질의하는 방법과 데이터를 삽입하는 방법은 동일하다.
- 다만, 이 때에는
search 메서드를 사용하다. - 또한,
doc 문서도 조금 다르다. - 기본적으로
SQL 과 문법이 다르기 때문에 공식문서를 확인한다.
실행
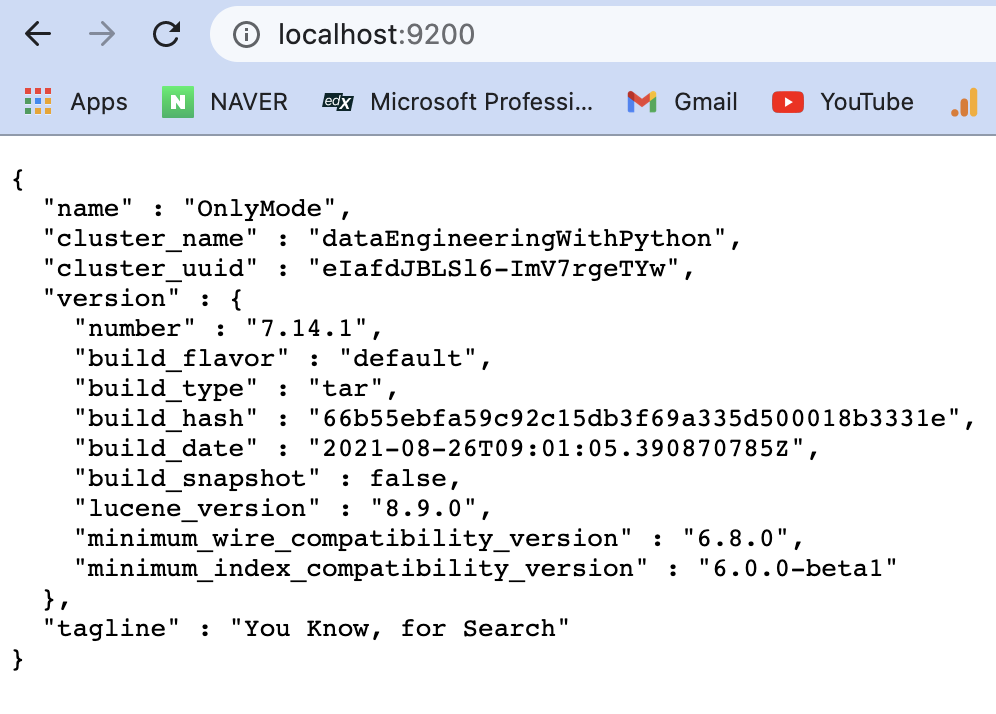
- 본 테스트를 실행하기에 앞서서,
Elasticsearch 과 Kibana 를 먼저 구동시키고, 데이터가 미리 삽입 되어 있으면 좋다.
실습 1 - 전체 데이터 확인
- 먼저 아래코드를 복사한 뒤 붙여넣기 하여 실행시켜보도록 한다.
from elasticsearch import Elasticsearch
from pandas.io.json import json_normalize

es = Elasticsearch()

doc={"query":{"match_all":{}}}
res=es.search(index="users", body=doc, size=10)
print(res['hits']['hits'])

# 각 문서의 `_source`필드 출력만 가능
# for doc in res['hits']['hits']:
#   print(doc['_source'])

# pandas DataFrame
print("----------")
df = json_normalize(res['hits']['hits'])
print(df)
(venv) $ python3 step04_3_elasticsearch_query.py
/Users/evan/Desktop/data_engineering_python/venv/lib/python3.8/site-packages/elasticsearch/connection/base.py:208: ElasticsearchWarning: Elasticsearch built-in security features are not enabled. Without authentication, your cluster could be accessible to anyone. See https://www.elastic.co/guide/en/elasticsearch/reference/7.14/security-minimal-setup.html to enable security.
  warnings.warn(message, category=ElasticsearchWarning)
[{'_index': 'users', '_type': 'doc', '_id': '4Vam5HsBtoEC6_MiP2z3', '_score': 1.0, '_source': {'name': 'Toni Nguyen', 'street': '6060 Justin Freeway Suite 557', 'city': 'East Aaronstad', 'zip': '43029'}}, {'_index': 'users', '_type': 'doc', '_id': '41bN5HsBtoEC6_Mig2w3', '_score': 1.0, '_source': {'name': 'Jennifer Barr', 'street': '02693 Laura Views Apt. 582', 'city': 'Ericside', 'zip': '50021'}}, {'_index': 'users', '_type': 'doc', '_id': '5FbN5HsBtoEC6_Mig2w4', '_score': 1.0, '_source': {'name': 'Alex White', 'street': '674 Mcclure Islands', 'city': 'Richardfort', 'zip': '91321'}}, {'_index': 'users', '_type': 'doc', '_id': '5VbN5HsBtoEC6_Mig2w4', '_score': 1.0, '_source': {'name': 'Michael Melendez', 'street': '1732 Andrews Lakes Suite 023', 'city': 'West Rachaelhaven', 'zip': '96479'}}, {'_index': 'users', '_type': 'doc', '_id': '5lbN5HsBtoEC6_Mig2w4', '_score': 1.0, '_source': {'name': 'Dennis Moore', 'street': '4901 Barber Turnpike Suite 009', 'city': 'Lake Abigail', 'zip': '91137'}}, {'_index': 'users', '_type': 'doc', '_id': '51bN5HsBtoEC6_Mig2w4', '_score': 1.0, '_source': {'name': 'Angela Santiago', 'street': '2635 Duncan Isle Apt. 292', 'city': 'Garyton', 'zip': '74345'}}, {'_index': 'users', '_type': 'doc', '_id': '6FbN5HsBtoEC6_Mig2w4', '_score': 1.0, '_source': {'name': 'Cynthia Randall', 'street': '8738 Johnson Underpass', 'city': 'Brianshire', 'zip': '02178'}}, {'_index': 'users', '_type': 'doc', '_id': '6VbN5HsBtoEC6_Mig2w4', '_score': 1.0, '_source': {'name': 'James Schneider', 'street': '14248 Gregory Loaf', 'city': 'West Lindamouth', 'zip': '47982'}}, {'_index': 'users', '_type': 'doc', '_id': '6lbN5HsBtoEC6_Mig2w4', '_score': 1.0, '_source': {'name': 'Jonathan George', 'street': '8183 Flores Springs Apt. 129', 'city': 'South Jeffreyland', 'zip': '61791'}}, {'_index': 'users', '_type': 'doc', '_id': '61bN5HsBtoEC6_Mig2w4', '_score': 1.0, '_source': {'name': 'William Cooper', 'street': '338 Jeffrey Canyon Apt. 624', 'city': 'Wilkersonside', 'zip': '01065'}}]
----------
step04_3_elasticsearch_query.py:16: FutureWarning: pandas.io.json.json_normalize is deprecated, use pandas.json_normalize instead
  df = json_normalize(res['hits']['hits'])
  _index _type                   _id  _score      _source.name                  _source.street       _source.city _source.zip
0  users   doc  4Vam5HsBtoEC6_MiP2z3     1.0       Toni Nguyen   6060 Justin Freeway Suite 557     East Aaronstad       43029
1  users   doc  41bN5HsBtoEC6_Mig2w3     1.0     Jennifer Barr      02693 Laura Views Apt. 582           Ericside       50021
2  users   doc  5FbN5HsBtoEC6_Mig2w4     1.0        Alex White             674 Mcclure Islands        Richardfort       91321
3  users   doc  5VbN5HsBtoEC6_Mig2w4     1.0  Michael Melendez    1732 Andrews Lakes Suite 023  West Rachaelhaven       96479
4  users   doc  5lbN5HsBtoEC6_Mig2w4     1.0      Dennis Moore  4901 Barber Turnpike Suite 009       Lake Abigail       91137
5  users   doc  51bN5HsBtoEC6_Mig2w4     1.0   Angela Santiago       2635 Duncan Isle Apt. 292            Garyton       74345
6  users   doc  6FbN5HsBtoEC6_Mig2w4     1.0   Cynthia Randall          8738 Johnson Underpass         Brianshire       02178
7  users   doc  6VbN5HsBtoEC6_Mig2w4     1.0   James Schneider              14248 Gregory Loaf    West Lindamouth       47982
8  users   doc  6lbN5HsBtoEC6_Mig2w4     1.0   Jonathan George    8183 Flores Springs Apt. 129  South Jeffreyland       61791
9  users   doc  61bN5HsBtoEC6_Mig2w4     1.0    William Cooper     338 Jeffrey Canyon Apt. 624      Wilkersonside       01065
- 이제 코드를 살펴본다.
- 우선
doc={"query":{"match_all":{}}} 에서 match_all 은 주어진 문서의 모든 문서를 질의하는 요청에 해당함. search 는 크게 index 명은 문서 객체를 의미하며 body 쿼리 내용을 저장하는 곳이다. 그리고, 마지막으로 결과집합의 크기도 지정한다.- 검색된 문서들을 출력한다.
- 출력시 해당 쿼리는 JSON 객체로 반환됨을 유의한다.
json_normalize 함수는 JSON 객체를 데이터프레임으로 변환할 때 주로 사용한다.
실습 2 - 질의 응용 (1)
- 이번에는
match_all 대신에 특정 이름만 출력하도록 한다. - 먼저 파이썬 코드를 작성해본다.
- 여기서 봐야 하는 코드는
doc 이하 구문이다.
from elasticsearch import Elasticsearch

es = Elasticsearch()
doc = {"query": {"match":{"name":"Toni Nguyen"}}}
res = es.search(index="users", body=doc, size=10)
print(res['hits']['hits'][0]['_source'])
- 이제 해당 코드를 실행하면 특정 이름과 연관된 결괏값만 확인할 수 있을 것이다.
python3 step04_4_elasticsearch_query_match.py
/Users/evan/Desktop/data_engineering_python/venv/lib/python3.8/site-packages/elasticsearch/connection/base.py:208: ElasticsearchWarning: Elasticsearch built-in security features are not enabled. Without authentication, your cluster could be accessible to anyone. See https://www.elastic.co/guide/en/elasticsearch/reference/7.14/security-minimal-setup.html to enable security.
  warnings.warn(message, category=ElasticsearchWarning)
{'name': 'Toni Nguyen', 'street': '6060 Justin Freeway Suite 557', 'city': 'East Aaronstad', 'zip': '43029'}
실습 3 - 질의 응용 (2)
- 이번에는 Boolean 연산자 및 필터를 이용해서 좀 더 정밀하게 검색을 하도록 한다.
- 이 때에는
bool 필드에 must 나, must not, should 를 지정하고 filter 필드에 조건을 지정하는 식이면 좋다. - 먼저 파이썬 코드를 확인해본다.
from elasticsearch import Elasticsearch

es = Elasticsearch()
doc = {
    "query": {
        "bool": {
            "must": {
                "match": {"city": "East Aaronstad"}
            },
            "filter": {
                "term":{"zip":"43029"}
            }
        }
    }
}

res = es.search(index="users", body=doc, size=10)
print(res['hits']['hits'][0]['_source'])
- 먼저,
city: East Aaronstad 와 매칭데는 모든 데이터가 조회된다. - 그 후에, filter 조건문에서
zip 코드가 43029 번호만 남게 하면 된다. - 이제 파일을 실행하여 결괏값을 확인한다.
- 기존에 이름을 통해 검색한 결과와 동일하게 나타나는 것을 확인할 수 있다.
(venv) $ python3 step04_5_elasticsearch_query_bool.py
/Users/evan/Desktop/data_engineering_python/venv/lib/python3.8/site-packages/elasticsearch/connection/base.py:208: ElasticsearchWarning: Elasticsearch built-in security features are not enabled. Without authentication, your cluster could be accessible to anyone. See https://www.elastic.co/guide/en/elasticsearch/reference/7.14/security-minimal-setup.html to enable security.
  warnings.warn(message, category=ElasticsearchWarning)
{'name': 'Toni Nguyen', 'street': '6060 Justin Freeway Suite 557', 'city': 'East Aaronstad', 'zip': '43029'}
- 검색 결과 집합의 크기를 10으로 설정했다. 그러나, 만약 10,000개 이상일 경우에는 부하가 걸리는 등 약간의 어려움이 노출이 된다.
- 보통 이런 경우, 데이터를 여러번 나누어서 가져와야 하는데, 스크롤 함수를 통해서 해결이 가능하다.
- 먼저 코드를 통해서 다수의 데이터를 가져오도록 한다.
from elasticsearch import Elasticsearch

es = Elasticsearch()
res = es.search(
    index='users',
    doc_type='doc',
    scroll='20m',
    size=500,
    body={'query':{'match_all':{}}}
)

sid = res['_scroll_id']
size = res['hits']['total']['value']
while (size > 0):
    res = es.scroll(scroll_id= sid, scroll='20m')
    sid = res['_scroll_id']
    size = len(res['hits']['hits'])
    idx = 0
    for doc in res['hits']['hits']:
        print(doc['_source'])
        if idx == 5:
            break
        idx += 1
- 먼저
search() 에서 size는 500개로 설정한다. _scroll_id 는 scroll 호출 시 찌정한다.- while 반복문을 이용하여 스크롤링을 시작한다. 이 때, 이 루프는 size가 0보다 큰 동안만 반복하며, size가 0이면 더 이상의 데이터가 없다는 것을 의미 한다.
- sid와 size는 데이터를 더 가져오기 위해 새로운 스크롤 ID와 크기를 저장하는 것을 말한다.
- for 반복문 내의 if 조건문은 삭제 후 실행하면 모든 데이터가 나타나게 된다.
- 이제 파일을 실행해본다.
(venv) $ python3 step04_6_elasticsearch_scroll.py
/Users/evan/Desktop/data_engineering_python/venv/lib/python3.8/site-packages/elasticsearch/connection/base.py:208: ElasticsearchWarning: Elasticsearch built-in security features are not enabled. Without authentication, your cluster could be accessible to anyone. See https://www.elastic.co/guide/en/elasticsearch/reference/7.14/security-minimal-setup.html to enable security.
  warnings.warn(message, category=ElasticsearchWarning)
/Users/evan/Desktop/data_engineering_python/venv/lib/python3.8/site-packages/elasticsearch/connection/base.py:208: ElasticsearchWarning: [types removal] Specifying types in search requests is deprecated.
  warnings.warn(message, category=ElasticsearchWarning)
{'name': 'Roberta Garrett', 'street': '622 Mullen Run', 'city': 'Johnbury', 'zip': '99188'}
{'name': 'Dr. Gregory Pitts', 'street': '2713 Anne Bridge', 'city': 'Tracychester', 'zip': '15536'}
{'name': 'Parker Rodriguez', 'street': '99259 Michelle Islands Suite 573', 'city': 'Grayview', 'zip': '94752'}
{'name': 'James Key', 'street': '6371 Claudia Neck', 'city': 'Zoetown', 'zip': '56028'}
{'name': 'John Manning', 'street': '22124 White Motorway', 'city': 'West John', 'zip': '79730'}
{'name': 'Sara Davidson', 'street': '339 Brian Landing', 'city': 'Larsonfurt', 'zip': '83689'}
{'name': 'Michael Sanders', 'street': '98018 Smith Trafficway Apt. 221', 'city': 'North Lisa', 'zip': '16332'}
{'name': 'Diana Schultz', 'street': '1902 Kristin Dale Apt. 983', 'city': 'Harveybury', 'zip': '77036'}
{'name': 'Amber Pratt', 'street': '40199 Harry Brooks Suite 081', 'city': 'Sharonmouth', 'zip': '08817'}
{'name': 'Michelle Cook', 'street': '24013 Alvarado Rest', 'city': 'Evanside', 'zip': '26897'}
{'name': 'Carmen Spears', 'street': '02924 Pearson Turnpike', 'city': 'West Heathermouth', 'zip': '20586'}
{'name': 'Kimberly Baker', 'street': '2997 Sloan Parkway Apt. 846', 'city': 'Tracyshire', 'zip': '04234'}
{'name': 'James Wilkinson', 'street': '063 Mark Mills Suite 670', 'city': 'Lewisburgh', 'zip': '69009'}
{'name': 'Valerie Fitzpatrick', 'street': '48374 Smith Throughway', 'city': 'Gonzalezhaven', 'zip': '86867'}
{'name': 'Ricardo Kim', 'street': '40378 Riley Trafficway', 'city': 'Lake Jared', 'zip': '05818'}
{'name': 'Charles Walker', 'street': '038 Reid Centers', 'city': 'North Travis', 'zip': '44111'}
{'name': 'Suzanne Mendoza', 'street': '36816 Owens Streets Suite 897', 'city': 'Elizabethhaven', 'zip': '26540'}
{'name': 'Adam Hamilton', 'street': '19219 Davis Falls', 'city': 'New Ryan', 'zip': '43903'}
References