강의소개
개요
- 간단한 프로젝트라도 DB와 연동하는 작업은 매우 중요하다.
- 클라우드 DB를 사용하기 위해서는 클라우드 회원가입 등 번거로운 절차를 거쳐야 하며, 또한 비용도 추가될 수도 있다.
SQLite를 사용하면 간단한 DB 작업도 진행할 수 있다.- Streamlit + SQLite 연동 작업을 간단히 하도록 해본다.
SQLite
- 데이터 핸들링을 하기 위해서는 Python 기초 문법, Pandas 라이브러리를 배워야 한다.
- Pandas는 본 블로그에서 CSV 파일을 읽고 저장을 하는데 사용을 하게 된다.
- SQLite는 입문자가 시작할 수 있는 가장 간단한 DB이다.
- 개별 PC에 로컬 파일을 생성하며, 이 파일에 대해 PostgresDB와 거의 동일한 쿼리를 실행할 수 있습니다.
- 웹싸이트 : https://sqlite.org/index.html
Streamlit
- Python으로 웹을 가장 빠르게 만드는 방법은 Streamlit 이다.
- 다중 페이지 등을 제작할 수 있는 방법론이 나오기도 했다.
- 가장 좋은 장점은 SQLite를 사용할 수 있다는 점이다.
Streamlit Code
import sqlite3
import streamlit as st
import pandas as pd
import os

def create_connection(db_file):
    """ create a database connection to the SQLite database
        specified by the db_file
    :param db_file: database file
    :return: Connection object or None
    """
    conn = None
    try:
        conn = sqlite3.connect(db_file)
    except Exception as e:
        st.write(e)

    return conn

def create_database():
    st.markdown("# Create Database")

    st.write("""A database in SQLite is just a file on same server.
    By convention their names always end in .db""")

    db_filename = st.text_input("DB Filename")
    create_db = st.button('Create Database')

    if create_db:
        if db_filename.endswith('.db'):
            conn = create_connection(db_filename)
            st.write(conn) # success message?
        else:
            st.write('DB filename must end with .db, please retry.')

def upload_data():
    st.markdown("# Upload Data")
    # https://discuss.streamlit.io/t/uploading-csv-and-excel-files/10866/2
    sqlite_dbs = [file for file in os.listdir('.') if file.endswith('.db')]
    db_filename = st.selectbox('DB Filename', sqlite_dbs)
    table_name = st.text_input('Table Name to Insert')
    conn = create_connection(db_filename)
    uploaded_file = st.file_uploader('Choose a file')
    if uploaded_file is not None:
        #read csv
        try:
            df = pd.read_csv(uploaded_file)
            df.to_sql(name=table_name, con=conn)
            st.write('Data uploaded successfully. These are the first 5 rows.')
            st.dataframe(df.head(5))

        except Exception as e:
            st.write(e)

def run_query():
    st.markdown("# Run Query")
    sqlite_dbs = [file for file in os.listdir('.') if file.endswith('.db')]
    db_filename = st.selectbox('DB Filename', sqlite_dbs)

    query = st.text_area("SQL Query", height=100)
    conn = create_connection(db_filename)

    submitted = st.button('Run Query')

    if submitted:
        try:
            query = conn.execute(query)
            cols = [column[0] for column in query.description]
            results_df= pd.DataFrame.from_records(
                data = query.fetchall(),
                columns = cols
            )
            st.dataframe(results_df)
        except Exception as e:
            st.write(e)

    st.sidebar.markdown("# Run Query")

page_names_to_funcs = {
    "Create Database": create_database,
    "Upload Data": upload_data,
    "Run Query": run_query,
}

selected_page = st.sidebar.selectbox("Select a page", page_names_to_funcs.keys())
page_names_to_funcs[selected_page]()
코드 설명 1 - Python Packages
import sqlite3
import streamlit as st
import pandas as pd
import os
sqlite3와 os는 Python의 내장 패키지이며 별도로 설치할 필요가 없다.pandas와 streamlit 라이브러리는 pip install ~ 로 설치를 해야 한다.
코드 설명 2 - create_connection(db_file)
def create_connection(db_file):
    """ create a database connection to the SQLite database specified by the db_file
    :param db_file: database file
    :return: Connection object or None
    """
    conn = None
    try:
        conn = sqlite3.connect(db_file)
    except Exception as e:
        st.write(e)

    return conn
- 해당 함수의 역할은
db_file 파라미터 값을 받으면 sqlite3.connect 연동이 되도록 설계 한다. - 만약, 해당 DB file이 정상적으로 연결이 되면
conn 저장이 되도록 한다. - 만약, 없다면 예외처리로 진행한다.
코드 설명 3 - create_database ()
def create_database():
    st.markdown("# Create Database")

    st.write("""A database in SQLite is just a file on same server.
    By convention their names always end in .db""")

    db_filename = st.text_input("DB Filename")
    create_db = st.button('Create Database')

    if create_db:
        if db_filename.endswith('.db'):
            conn = create_connection(db_filename)
            st.write(conn) # success message?
        else:
            st.write('DB filename must end with .db, please retry.')
Create Database 버튼을 클릭하면- DB명이 정상적으로
db명.db 처럼 들어오게 되면 database가 생성이 된다. - 만약, 잘못된 이름이 입력되면 에러 메시지를 내보내어 다시 입력하도록 한다.
코드 설명 4 - update_data()
def upload_data():
    st.markdown("# Upload Data")
    # https://discuss.streamlit.io/t/uploading-csv-and-excel-files/10866/2
    sqlite_dbs = [file for file in os.listdir('.') if file.endswith('.db')]
    db_filename = st.selectbox('DB Filename', sqlite_dbs)
    table_name = st.text_input('Table Name to Insert')
    conn = create_connection(db_filename)
    uploaded_file = st.file_uploader('Choose a file')
    if uploaded_file is not None:
        #read csv
        try:
            df = pd.read_csv(uploaded_file)
            df.to_sql(name=table_name, con=conn)
            st.write('Data uploaded successfully. These are the first 5 rows.')
            st.dataframe(df.head(5))

        except Exception as e:
            st.write(e)
- 위 코드는 csv 파일을 업로드하여 특정 DB에 테이블로 추가하는 코드이다.
sqlite_dbs 객체는 저장된 .db 종류를 보여준다. 즉, 데이터베이스를 지정하는 코드라고 보면 된다.table_name 객체는 사용자가 직접 테이블 이름을 입력한다.uploaded_file 객체는 파일을 업로더 하도록 도와준다.if 조건문은 정상적으로 파일이 업로드가 되면, pandas 데이터 프레임으로 읽고, table로 해당 객체를 저장하는 명령어를 의미한다.
코드 설명 5 - run_query()
def run_query():
    st.markdown("# Run Query")
    sqlite_dbs = [file for file in os.listdir('.') if file.endswith('.db')]
    db_filename = st.selectbox('DB Filename', sqlite_dbs)

    query = st.text_area("SQL Query", height=100)
    conn = create_connection(db_filename)

    submitted = st.button('Run Query')

    if submitted:
        try:
            query = conn.execute(query)
            cols = [column[0] for column in query.description]
            results_df= pd.DataFrame.from_records(
                data = query.fetchall(),
                columns = cols
            )
            st.dataframe(results_df)
        except Exception as e:
            st.write(e)

    st.sidebar.markdown("# Run Query")
- 위 코드는
DB명을 지정 후, 쿼리를 작성하도록 하는 것이다. Run Query 버튼을 클릭하면, 해당 쿼리를 실행한다.- 이 때, 실행 결과는 크게 세가지로 나눠서 진행이 된다.
- 쿼리 실행 시, cols 객체는 결과 테이블의 컬럼명을 리스트로 저장한다.
- 쿼리 실행 시, query.fetchall() 각 데이터를 리스트로 저장한다.
- 각 쿼리는
from_records를 통해서 데이터 프레임으로 저장된다.
코드 설명 6 - 사이드바
def main():
    page_names_to_funcs = {
        "Create Database": create_database,
        "Upload Data": upload_data,
        "Run Query": run_query,
    }

    selected_page = st.sidebar.selectbox("Select a page", page_names_to_funcs.keys())
    page_names_to_funcs[selected_page]()

if __name__ == '__main__':
    main()
page_names_to_funcs 딕셔너리 value 값에 저장된 것은 지정한 사용자 정의 함수이다.
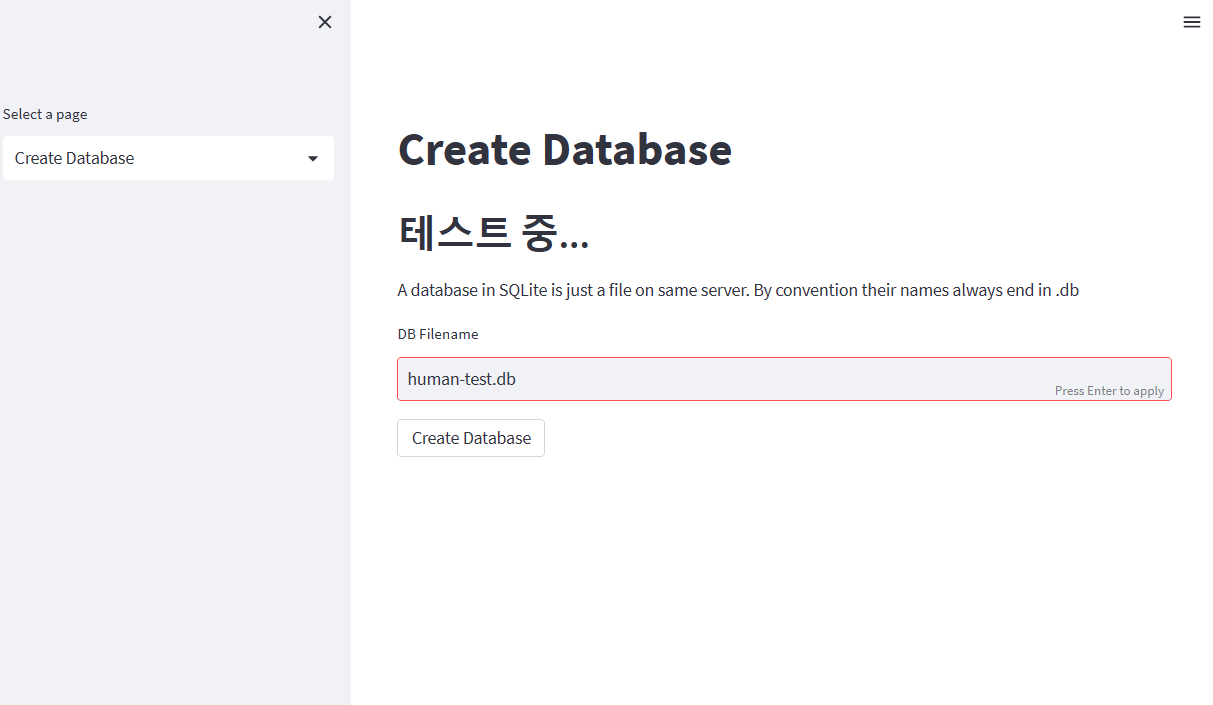
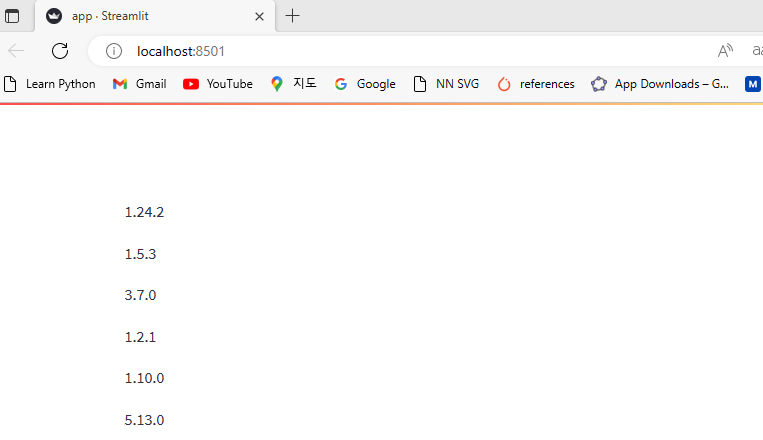
시연 이미지