패키지 관리자 설치
Chocolatey (Windows)
- If you are on a Windows machine and use Chocolatey for package management, you can install Hugo with the following one-liner:
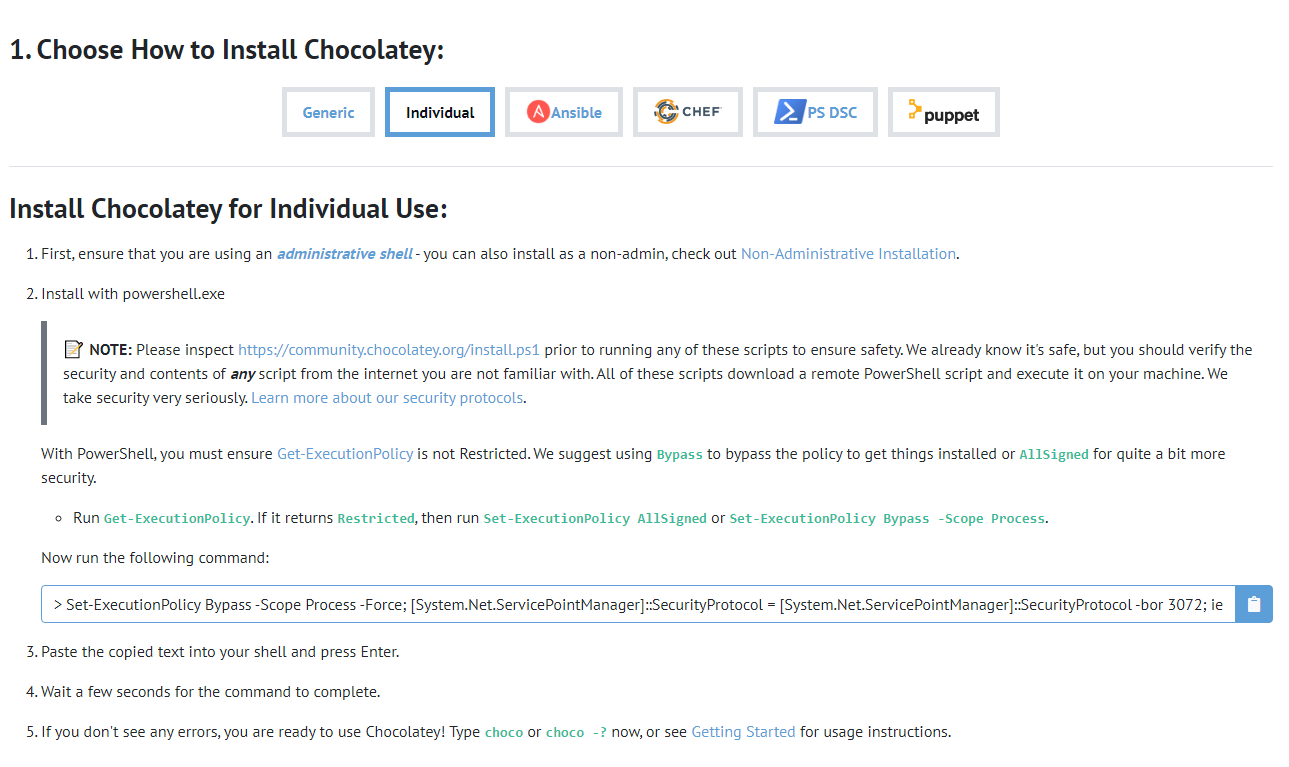
- 우선 PowerShell을 관리자로 실행 후, 아래와 같이 Chocolately를 설치한다.
- 명령어 :
Set-ExecutionPolicy Bypass -Scope Process -Force; [System.Net.ServicePointManager]::SecurityProtocol = [System.Net.ServicePointManager]::SecurityProtocol -bor 3072; iex ((New-Object System.Net.WebClient).DownloadString('[https://community.chocolatey.org/install.ps1](https://community.chocolatey.org/install.ps1)'))
Windows PowerShell
Copyright (C) Microsoft Corporation. All rights reserved.

새로운 크로스 플랫폼 PowerShell 사용 https://aka.ms/pscore6
PS C:\WINDOWS\system32> Set-ExecutionPolicy Bypass -Scope Process -Force; [System.Net.ServicePointManager]::SecurityProtocol = [System.Net.ServicePointManager]::SecurityProtocol -bor 3072; iex ((New-Object System.Net.WebClient).DownloadString('https://community.chocolatey.org/install.ps1'))
Forcing web requests to allow TLS v1.2 (Required for requests to Chocolatey.org)
Getting latest version of the Chocolatey package for download.
Not using proxy.
Getting Chocolatey from https://community.chocolatey.org/api/v2/package/chocolatey/1.1.0.
Downloading https://community.chocolatey.org/api/v2/package/chocolatey/1.1.0 to C:\Users\512-24\AppData\Local\Temp\chocolatey\chocoInstall\chocolatey.zip
Not using proxy.
Extracting C:\Users\512-24\AppData\Local\Temp\chocolatey\chocoInstall\chocolatey.zip to C:\Users\512-24\AppData\Local\Temp\chocolatey\chocoInstall
Installing Chocolatey on the local machine
Creating ChocolateyInstall as an environment variable (targeting 'Machine')
  Setting ChocolateyInstall to 'C:\ProgramData\chocolatey'
WARNING: It's very likely you will need to close and reopen your shell
  before you can use choco.
Restricting write permissions to Administrators
We are setting up the Chocolatey package repository.
The packages themselves go to 'C:\ProgramData\chocolatey\lib'
  (i.e. C:\ProgramData\chocolatey\lib\yourPackageName).
A shim file for the command line goes to 'C:\ProgramData\chocolatey\bin'
  and points to an executable in 'C:\ProgramData\chocolatey\lib\yourPackageName'.

Creating Chocolatey folders if they do not already exist.

WARNING: You can safely ignore errors related to missing log files when
  upgrading from a version of Chocolatey less than 0.9.9.
  'Batch file could not be found' is also safe to ignore.
  'The system cannot find the file specified' - also safe.
chocolatey.nupkg file not installed in lib.
 Attempting to locate it from bootstrapper.
PATH environment variable does not have C:\ProgramData\chocolatey\bin in it. Adding...
경고: Not setting tab completion: Profile file does not exist at
'C:\Users\512-24\Documents\WindowsPowerShell\Microsoft.PowerShell_profile.ps1'.
Chocolatey (choco.exe) is now ready.
You can call choco from anywhere, command line or powershell by typing choco.
Run choco /? for a list of functions.
You may need to shut down and restart powershell and/or consoles
 first prior to using choco.
Ensuring Chocolatey commands are on the path
Ensuring chocolatey.nupkg is in the lib folder
PS C:\WINDOWS\system32>
choco를 활용한 Hugo 설치
- 설치 시, 관리자로 PowerShell을 실행한다.
$ choco install hugo-extended -confirm
$ hugo version
hugo v0.97.0-c07f3626e7c8160943591f4d209977efa02c3dca windows/amd64 BuildDate=2022-04-14T08:45:07Z VendorInfo=gohugoio
PS C:\WINDOWS\system32>
Git & Github 설치
- 이제 Git을 설치하도록 한다. Git이 있어야 배포를 할 수 있기 때문에 반드시 설치한다.
- Github 회원가입도 안했다면 회원가입을 진행하도록 한다.
Hugo 명령어를 활용한 첫번째 싸이트 만들기
- 간단한 명령어를 활용하여 싸이트를 생성한다.
- 명령어 :
hugo new site your_blog_name
- 필자는 폴더명을
myblog로 지정했다.
PS C:\Users\your_name\Desktop> hugo new site myblog
Congratulations! Your new Hugo site is created in C:\Users\512-24\Desktop\myblog.

Just a few more steps and you're ready to go:

1. Download a theme into the same-named folder.
   Choose a theme from https://themes.gohugo.io/ or
   create your own with the "hugo new theme <THEMENAME>" command.
2. Perhaps you want to add some content. You can add single files
   with "hugo new <SECTIONNAME>\<FILENAME>.<FORMAT>".
3. Start the built-in live server via "hugo server".

Visit https://gohugo.io/ for quickstart guide and full documentation.
Github & Submodule 설정
깃허브 Repo 작성
- myblog & username.github.io 두 개의 repo를 작성한다.
- 깃허브와 현재 작성중인 폴더(myblog)를 연결한다.
- 모든 명령어는
myblog/ 에서 적용한다. - 이 때 public 폴더가 있으면 지워준다.
cd myblog
rm -rf public
echo "# myblog" >> README.md
git init
git add README.md
git commit -m "first commit"
git branch -M main
git remote add origin https://github.com/rain0430/myblog.git
git push -u origin main
- 처음 깃헙을 하시는 분들은 주로 하단에서 에러가 나타날 것이다.
- 이는 로그인을 하라는 뜻이다. (RUN 아래 코드를 순차적으로 실행)
$ git commit -m "first commit"
Author identity unknown

*** Please tell me who you are.

Run

  git config --global user.email "you@example.com"
  git config --global user.name "Your Name"
- git commit 부터 다시 순차적으로 실행한다. git push 할 때, sign in 팝업창이 뜰 수도 있다.
- 이제 서브모듈(Submodule)을 통해서 배포를 진행하려고 한다.
- git 서브모듈을 추가한다.
$ git submodule add -b main https://github.com/rain0430/rain0430.github.io.git public
$ git submodule add -f https://github.com/rain0430/rain0430.github.io.git public
Hugo 기본 싸이트 확인
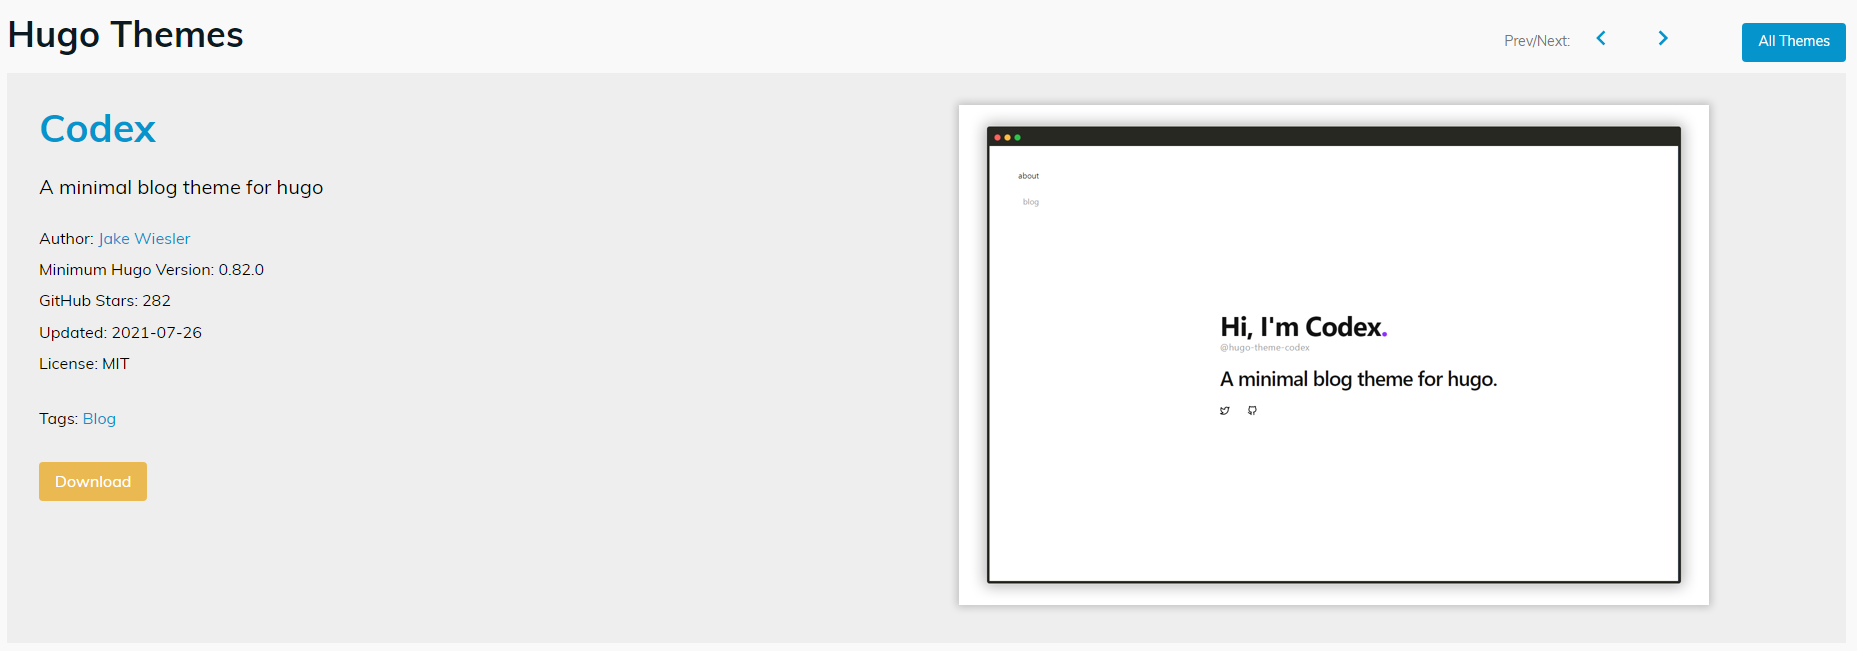
- 우선 기본 테마를 설정해본다.
- 필자는 다음 테마를 설정할 것이다. Codex | Hugo Themes (gohugo.io)
- 테마 설정 시, 약간의 팁을 드리면, Updated가 최근 날짜인지 확인한다. 최근 날짜가 아니라면 관리가 잘 안되어 테마일수도 있다.
- 각 테마마다 구체적인 설정 방법이 있기 때문에 각 설치 문서를 참조한다.