Shiny App Deployment Using GCP
I. 개요
Google Data Studio는 놀랍도록 유연한 도구로서 마케팅 대행사 중 Google Analytics를 활용한 업체들은 대부분 항상 사용합니다. 때로는 유연성이 더 필요할 때 R ’s Shiny 패키지를 사용하여 데이터 시각화 / 대시 보드 앱을 만드는 것이 매우 쉽습니다. 이 옵션을 사용하면 모든 소스의 데이터를 예측 모델링과 함께 사용할 수 있는 장점이 있습니다.
이 블로그 게시물은 3 부분으로 나누어져 있습니다.
- 먼저 Google Cloud Virtual Machine (VM)을 설정하고 웹 액세스를 허용하도록 방화벽 규칙을 구성합니다.
- R, RStudio 및 Shiny를 설치합니다.
- 마지막으로 우리는 Shiny 앱을 배포하려고 합니다.
II. 가상환경 설치
먼저 필자의 로컬 컴퓨터 환경은 다음과 같습니다.
- MacBook Air (13-inch, 2017)
- MacOS Mojave Version 10.14.4
- Processor 2.2 GHZ Intel Core i7
- Memory 8 GB 1600 MHZ DDR3
2017년 판매기준, 맥북에서 가장 저 사양의 컴퓨터라고 보시면 됩니다. 사실 큰 의미는 없습니다. 인터넷으로 구글 클라우드에 접속하면 되는 것이기 때문입니다. 물론 gcloud SDK를 설치해서 한다면 OS 버전 확인은 필수입니다.
(1) 구글 클라우드 Platform 계정
먼저 Google Cloud Platform 계정이 있어야하며 프로젝트를 설정해야합니다. 자세한 사항은 링크를 참고하여 주시기 바랍니다. 링크 - 구글 클라우드 플랫폼
(2) 가상환경 설정하기
보통 gcloud SDK를 활용하여 가상환경을 만들기도 합니다만, Terminal 환경이 익숙하지 않은 분들에게는 일단은 추천하지 않습니다. SDK를 활용하여 도전하고 싶다면 다음 링크를 참고하여 주시기 바랍니다. 링크 - Google Cloud SDK
구글 클라우드 환경에서 간단한 클릭으로 가상환경 설정하기를 진행하려고 합니다.
1단계: VM 클릭하기

2단계: VM 환경 설정하기
설정은 여러 방식으로 할 수 있습니다만, 전 기본만 사용해서 세팅하도록 하겠습니다. 제가 설정한 방법은 아래와 같습니다.
- Name: rshinydemo
- Region: asia-east1 (Taiwan)
- Zone: asia-east1-c
- Machine Type: small (1-shared vCPU) / 1.7 GB memory
- Boot Disk: Ubuntu 18.04 LTS
- Identify and API Access: Allow full access to all Cloud APIs
- Firewall: Allow HTTP traffic & Allow HTTPs traffic
위 내용을 아래 화면에서 입력 또는 클릭하면 됩니다.
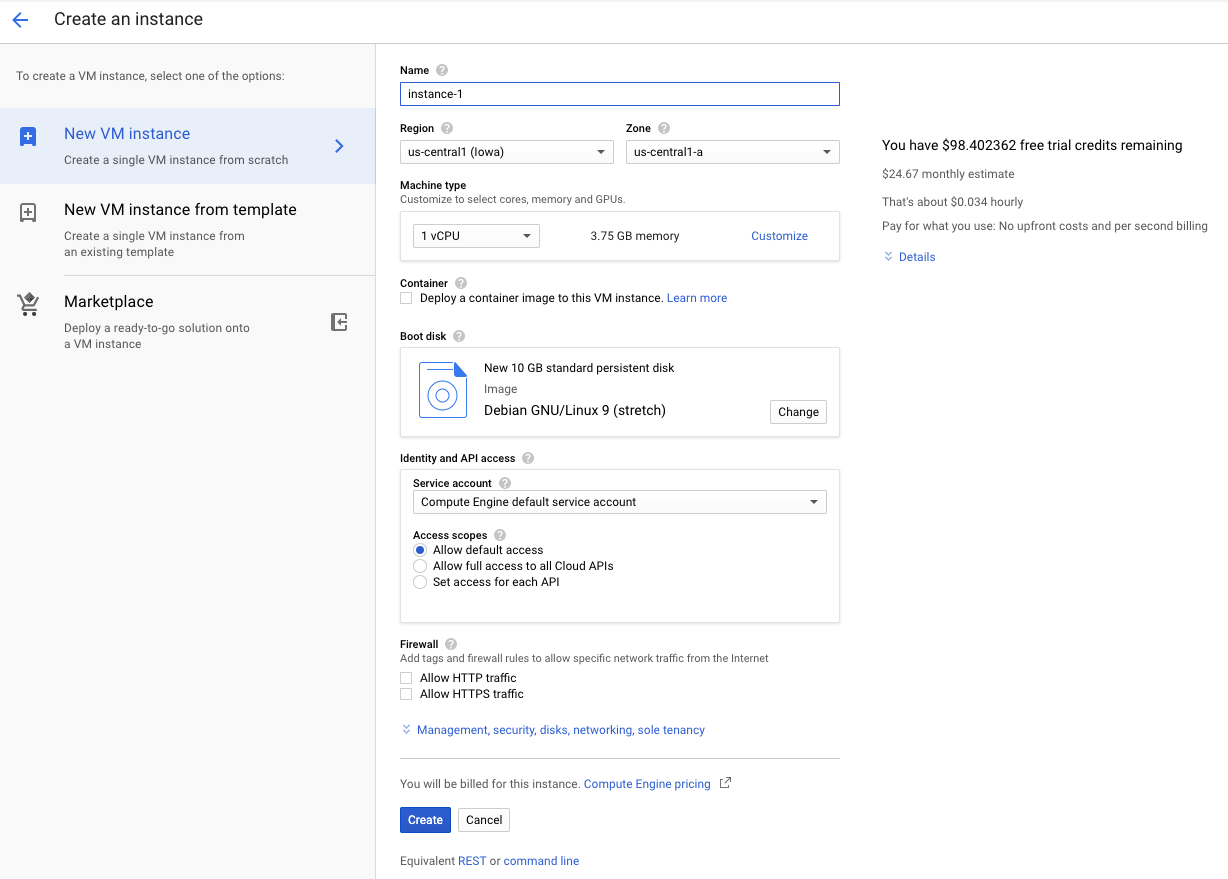
최종결과값이 아래와 같이 나오면 기본 환경 설정은 된 것입니다.

3단계: 고정 IP 설정하기
고정 외부 IP에 접속하기 위해 고정 IP를 설정하는 방법을 진행해야 합니다. VPC Network에서 External IP Addresses를 클릭후 Ephemeral를 Static를 바꿔 줍니다. 그러면, 고정 IP 등록에 관한 팝업창이 활성화가 되는데, 이 때 적절한 이름으로 등록합니다. 아래 화면처럼 바꿔줍니다.

4단계: Apache 웹서버로 외부 접속 되는지 확인하기
Cloud Shell를 연 다음, 간단하게 아래 코드를 입력하여 웹서버가 정상적으로 열리는지 확인합니다.
$ sudo apt-get update
$ sudo apt-get install apache2
$ sudo systemctl status apache2
● apache2.service - The Apache HTTP Server
...
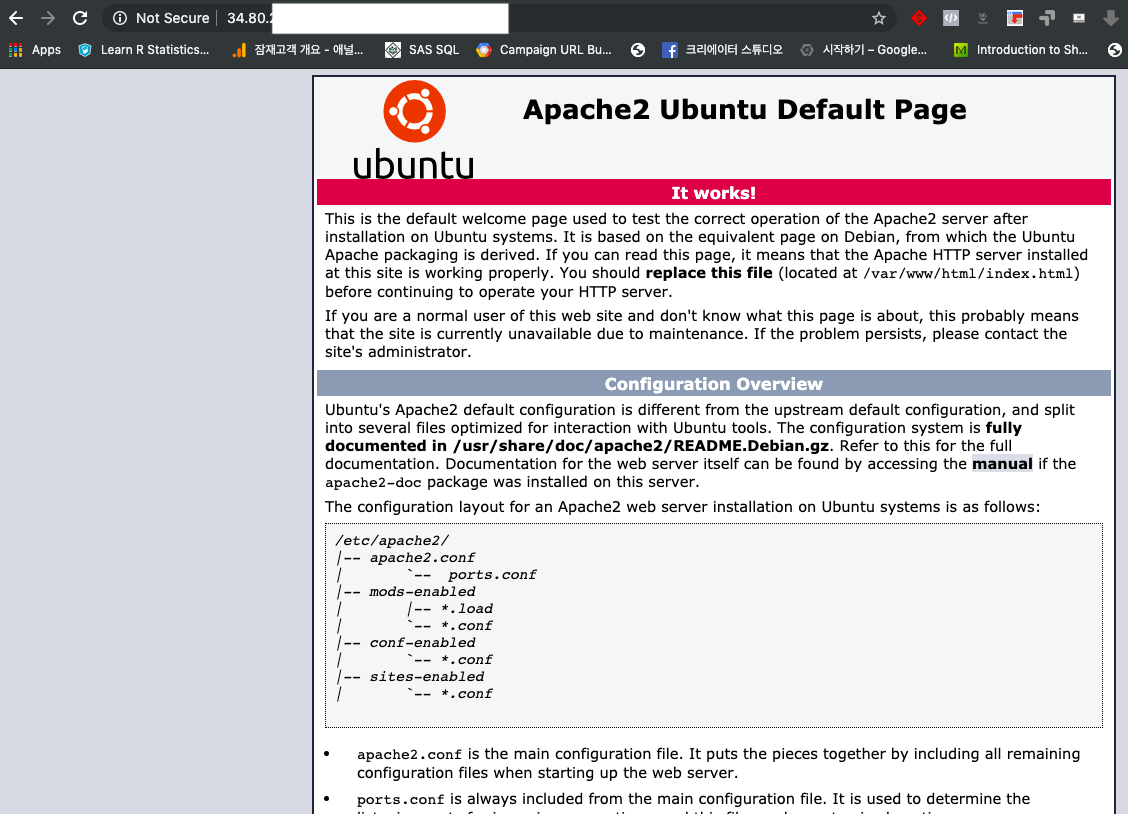
여기까지 진행 후, 위 초록색 색상의 apache2.service - The Apache HTTP Server 보이면 서버는 현재 작동중이라는 뜻입니다.
마지막으로 외부 IP를 활용하여, 확인하겠습니다.
III. 가상환경에 R과 RStudio 설치진행하기
아래 그림 상단 오른쪽에 Activate Cloud Shell을 클릭하면 가상환경 위 Terminal 환경이 나올겁니다. 여기에서 기본적인 R과 RStudio를 가상환경에서 설치 진행하도록 하겠습니다.
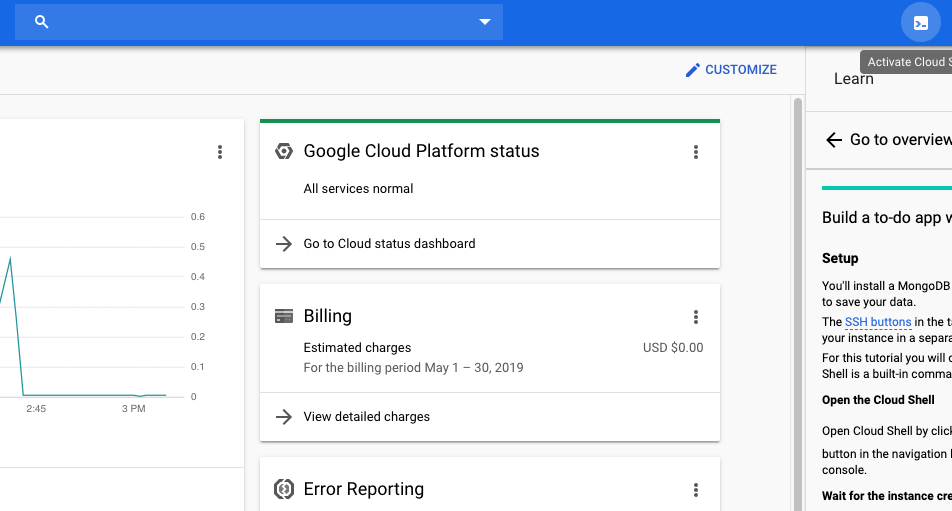
아래 그림에서 검은색 화면이 Cloud Shell 화면입니다.
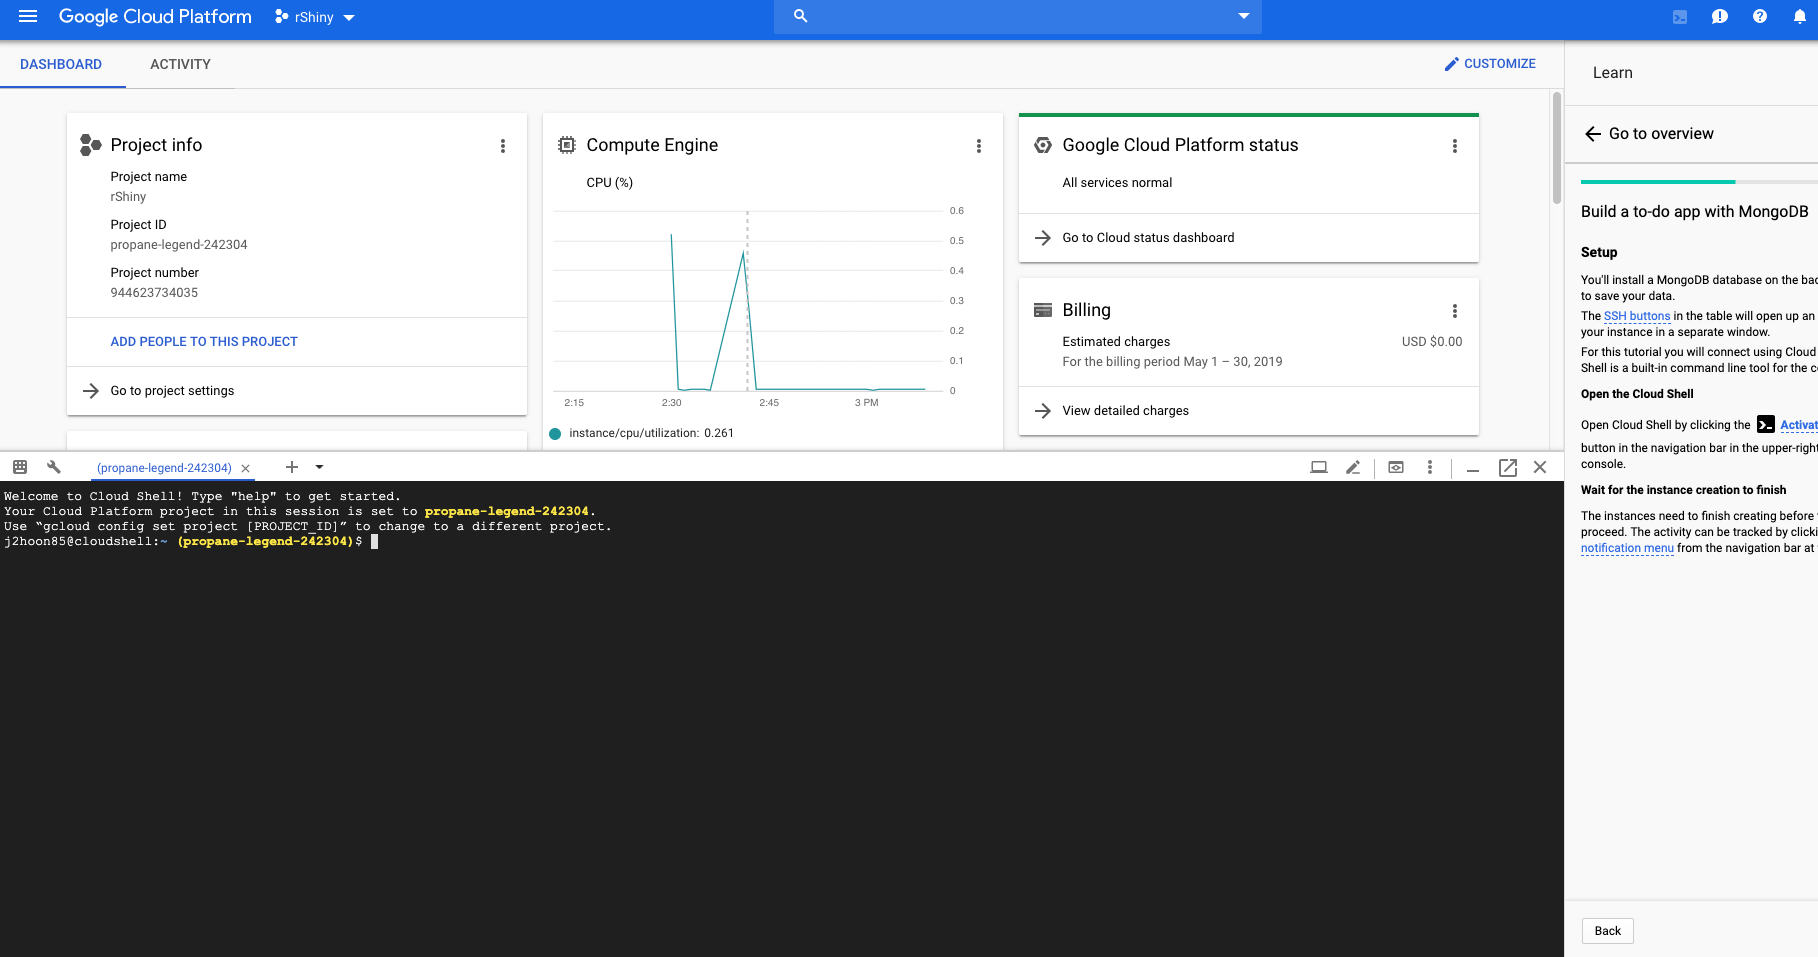
이제부터 Terminal 소스 코드를 입력하겠습니다.
1단계: 소프트웨어 업데이트하기
sudo apt-get update
sudo apt-get upgrade
만약, 중간에 **Do you want to continue? [Y/N]**라는 질문이 나오면 Y라고 답하고 계속 진행합니다.
성공적으로 끝나면 R 저장소를 sources.list 파일에 추가해야 우분투가 응용 프로그램을 가져올 위치를 알 수 있습니다. 아래의 코드 청크는 저장소 목록에 한 줄을 추가 한 다음 우분투 서버가 R을 다운로드하고 기존 패키지를 업데이트하며 r-base 및 r-base dev를 설치하는 데 필요한 키를 전달합니다.
2단계: Sources.list 파일에 Default List 설치하기
cd /etc/apt/sources.list 파일을 열어서 아래 코드를 추가합니다. (만약에 없을 경우)
$ sudo apt-get install emacs ## <- 편집 에디터 설치입니다. (옵션)
$ sudo emacs sources.list
deb http://archive.ubuntu.com/ubuntu bionic universe multiverse
deb-src http://archive.ubuntu.com/ubuntu bionic universe multiverse

deb http://us.archive.ubuntu.com/ubuntu/ bionic universe
deb-src http://us.archive.ubuntu.com/ubuntu/ bionic universe
deb http://us.archive.ubuntu.com/ubuntu/ bionic-updates universe
deb-src http://us.archive.ubuntu.com/ubuntu/ bionic-updates universe

deb http://us.archive.ubuntu.com/ubuntu/ bionic multiverse
deb-src http://us.archive.ubuntu.com/ubuntu/ bionic multiverse
deb http://us.archive.ubuntu.com/ubuntu/ bionic-updates multiverse
deb-src http://us.archive.ubuntu.com/ubuntu/ bionic-updates multiverse

deb http://security.ubuntu.com/ubuntu bionic-security universe
deb-src http://security.ubuntu.com/ubuntu bionic-security universe
deb http://security.ubuntu.com/ubuntu bionic-security multiverse
deb-src http://security.ubuntu.com/ubuntu bionic-security multiverse
3단계: R 설치하기
cd /etc/apt/sources.list 파일을 열어서 아래 코드를 추가합니다.
deb http://cran.rstudio.com/bin/linux/ubuntu xenial/
그 다음, CRAN Network와 연결 할 수 있는 Key ID를 입력합니다.
$ sudo apt-key adv --keyserver keyserver.ubuntu.com --recv-keys E084DAB9
$ sudo apt install software-properties-common
$ sudo apt install apt-transport-https
$ sudo apt update
$ sudo apt install r-base
만약에 depends: r-commended와 같은 에러가 발생이 되면 다음과 같이 수정을 합니다.
$ sudo apt-get install update-manager-core
$ sudo do-release-upgrade
위 코드에서 만약 에러가 나면 아래 코드에서 Prompt=normal로 되어 있는지 확인합니다. 만약 lts로 등록되어 있으면, normal로 수정 후 다시 sudo do-release-upgrade 명령어를 입력하고 ENTER를 수행합니다.
$ cat /etc/update-manager/release-upgrades
4단계: R 패키지 설치하기
$ sudo apt-get install libcurl4-openssl-dev libssl-dev libxml2-dev
5단계: R Shiny 설치하기
첫번째 방법: R 프로그램에서 R Shiny 설치하기
먼저 R을 실행하여 정상적으로 프로그램이 열리는지 확인합니다.
$ sudo R
다음부터는 R 스크립트를 활용하여 몇몇 패키지를 설치합니다. (설치시간 오래 걸립니다!)
install.packages(c('shiny', 'rmarkdown', 'dplyr'))
패키지 설치 후 q() 입력 후 작업공간을 저장합니다.
(save workspace? y for yes.)
두번째 방법: 터미널에서 R Shiny 설치하기
install.packages() 함수를 활용하여 shiny 패키지를 설치합니다. (설치시간 오래 걸립니다!)
$ sudo su - \
-c "R -e \"install.packages('shiny', repos='https://cran.rstudio.com/')\""
어떤 방법을 하던 큰 상관은 없습니다.
6단계: R Studio 서버 설치하기
RStudio 싸이트에서 직접 참고하였습니다. (Ubuntu 18+)
$ sudo apt-get install gdebi-core
$ sudo wget https://download2.rstudio.org/server/bionic/amd64/rstudio-server-1.2.1335-amd64.deb
$ sudo gdebi rstudio-server-1.2.1335-amd64.deb

위와 같은 형태가 나오면 성공입니다. 사용자(evan)를 추가하여 실제로 접속하도록 하겠습니다.
$ sudo adduser evan
http://외부IP:8787를 URL에 접속하면 RStudio Server가 접속이 될 것입니다.
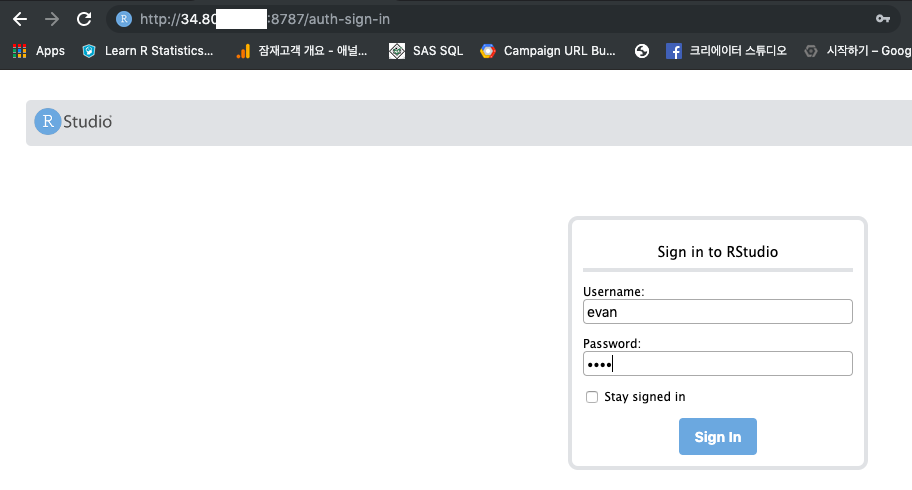
방금전에 만든 사용자 ID와 비번을 입력하여 접속합니다. 제대로 접속되었는지 확인합니다.
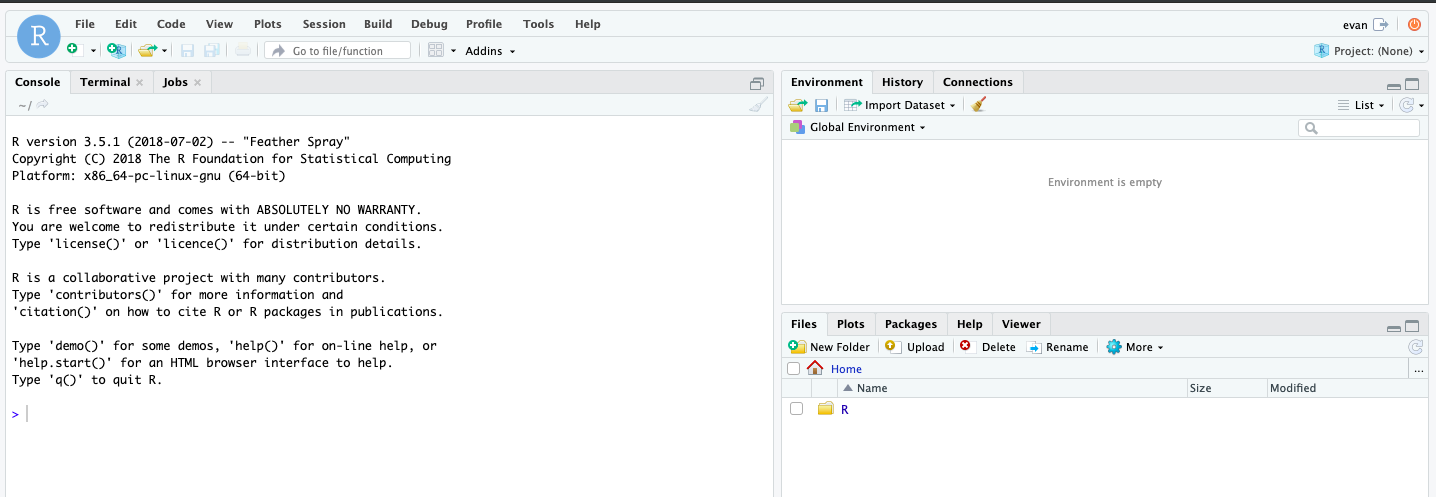
7단계: R Shiny 서버 설치하기
다시 터미널로 가서 아래와 같은 명령어를 입력합니다. 마찬가지로 R Shiny Server 홈페이지에서 직접 참고하였습니다. 참고: https://www.rstudio.com/products/shiny/download-server/
$ sudo wget https://download3.rstudio.org/ubuntu-14.04/x86_64/shiny-server-1.5.9.923-amd64.deb
$ sudo gdebi shiny-server-1.5.9.923-amd64.deb
$ sudo systemctl status shiny-server.service
http://외부IP:3838를 URL에 접속하면 RShiny Server가 접속이 될 것입니다.
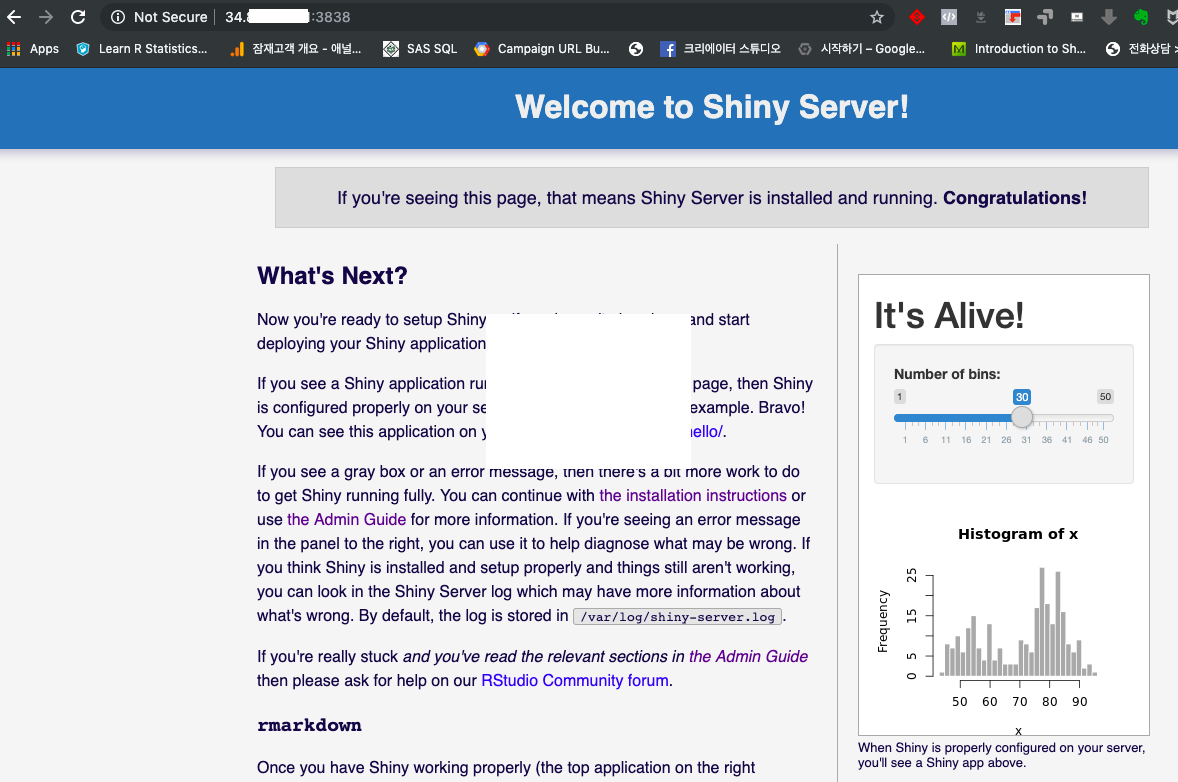
위와 같이 나왔다면 서버는 정상적으로 작동중입니다.
IV. Shiny App 배포
여기에서는 Shiny App에 관한 내용은 대해서는 생략하겠습니다.
(1) ui.R
library(shiny)

# Define UI for application that draws a histogram
shinyUI(fluidPage(

    # Application title
    titlePanel("Old Faithful Geyser Data"),

    # Sidebar with a slider input for number of bins
    sidebarLayout(
        sidebarPanel(
            sliderInput("bins",
                        "Number of bins:",
                        min = 1,
                        max = 50,
                        value = 30)
        ),

        # Show a plot of the generated distribution
        mainPanel(
            plotOutput("distPlot")
        )
    )
))
(2) server.R
library(shiny)

# Define server logic required to draw a histogram
shinyServer(function(input, output) {

    output$distPlot <- renderPlot({

        # generate bins based on input$bins from ui.R
        x    <- faithful[, 2]
        bins <- seq(min(x), max(x), length.out = input$bins + 1)

        # draw the histogram with the specified number of bins
        hist(x, breaks = bins, col = 'darkgray', border = 'white')

    })

})
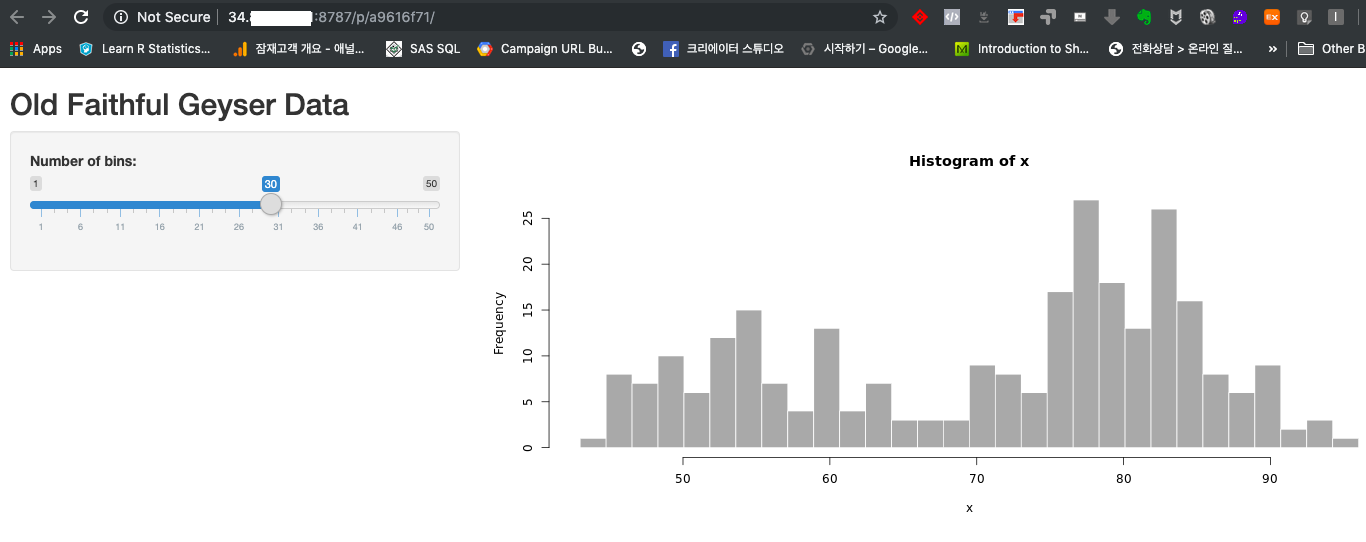
위와 같이 두개의 파일을 생성 후, 마지막으로 Run App을 실행합니다.
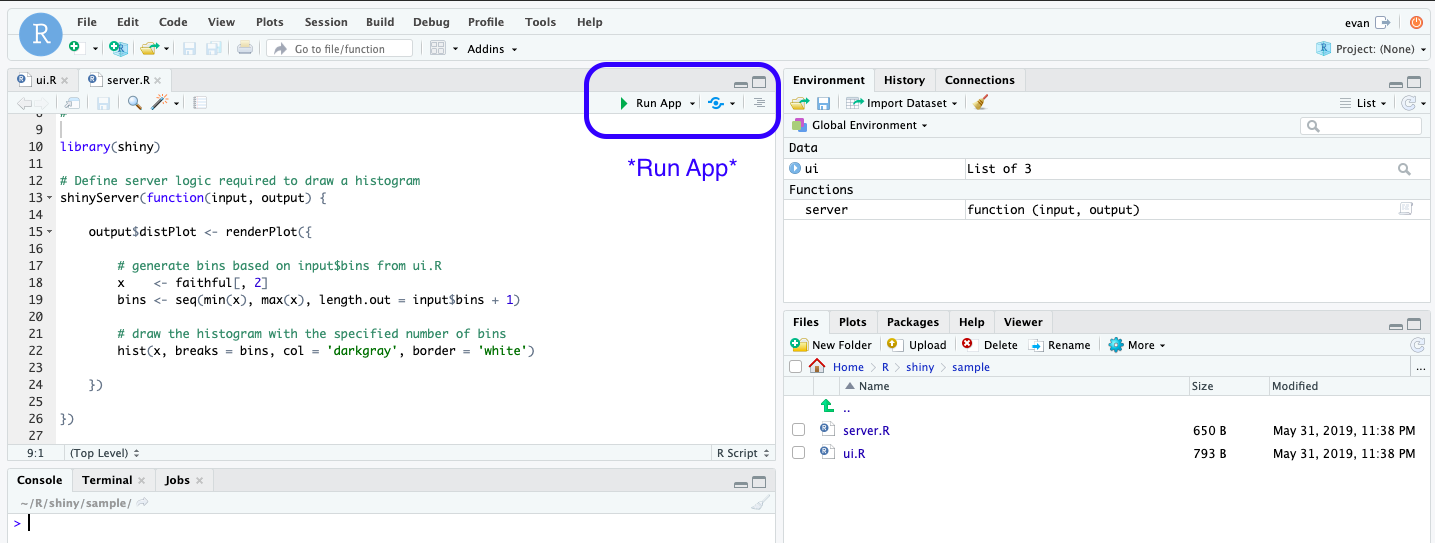
아래 주소에서도 확인할 수 있습니다.
V. 다른 사용자도 볼수 있도록 하고 싶다면?
(1) 작업 파일을 ui 파일에 붙이기
기본값으로, Shiny Server 는 /srv/shiny-server/를 싸이트 디렉토리로 사용합니다. 따라서, R 작업파일 디렉토리를 /srv/shiny-server/에 복사하도록 합니다.
제 경우는 /home/evan/R/shiny/sample/에 ui.R 파일과 server.R파일이 있기 때문에 아래와 같이 명령어를 통해 파일을 넣어놨습니다.
$ sudo cp -r evan/R/shiny/sample/ /srv/shiny-server/
(2) 웹주소 확인하기
브라우저 주소 입력창에 http://외부IP주소:3838/sample 입력합니다. sample 폴더명과 똑같다고 생각하면 됩니다.

V. Reference
조대협 . (2016, May 30). 구글 클라우드 생성하기 - VM 생성과 접속. Retrieved from https://bcho.tistory.com/1107
Download RStudio Server. (n.d.). Retrieved from https://www.rstudio.com/products/rstudio/download-server/
How to Deploy Interactive R Apps with Shiny Server. (2018, December 18). Retrieved from https://www.linode.com/docs/development/r/how-to-deploy-rshiny-server-on-ubuntu-and-debian/
Installation of R 3.5 on Ubuntu 18.04 LTS and tips for spatial packages. (2018, August 10). Retrieved from https://www.r-bloggers.com/installation-of-r-3-5-on-ubuntu-18-04-lts-and-tips-for-spatial-packages/
Introduction: Server documentation. (n.d.). Retrieved from https://help.ubuntu.com/lts/serverguide/configuration.html.en
