Streamlit App Deployment Compute Engine with Github Action in GCP
Page content
개요
- Google Compute Engine에서 Gihub Action을 구현하도록 한다.
프로젝트 생성
- 새 프로젝트 버튼을 클릭 후 프로젝트 명을
streamlit-gitaction으로 명명한다.

Instance 생성
Compute Engine > VM Instance선택 후, 새로운 인스턴스를 생성한다.

- 처음 사용하는 경우 사용 버튼을 클릭한다.

- 최초 작업에는 결제 필요 버튼이 나올 수 있다. 결제 사용 설정을 눌러 결제를 추가한다.


- 필자는 회사 계정을 사용한 것이므로 이렇게 나오지만, 일반 사용자는 화면이 다를 수 있다.
- VM 인스턴스를 생성한다.

- 인스턴스 이름과 리전과 영역은 다음과 같이 진행한다.

- 머신 구성은 다음과 같이 진행한다.

- 부팅 디스크는
Ubuntu 20.04에서 시작한다.

- ID 및 API 엑세스, 방화벽은 다음과 같이 진행한다.

- 만들기 버튼을 클릭하여 VM을 생성한다.

네트워크 보안
- 프로젝트 배포를 진행하려면 방화벽을 열어줘야 한다.
- 먼저 네트워크 세부정보 보기를 클릭한다.

- VPC 네트워크 탭 왼쪽 메뉴에서 방화벽을 클릭한다.

- 방화벽 > 방화벽 규칙만들기를 순차적으로 클릭한다.


- 여기에서 대상은 네트워크의 모든 인스턴스 / 소스 IPv4 범위는
0.0.0.0/0프로토콜은 모두 허용을 클릭한다.- 그러나 실무에서는 지정된 프로토콜만 사용하는 것이 일반적이기는 하다.

- 새로 생성된 것을 확인한다.

고정 IP 등록
- 왼쪽 사이드바 메뉴 > VPC 네트워크 > IP 주소 클릭한다.
- 화면 오른쪽 Label 클릭 후, 고정 IP 주소로 승급한다. (VM은 가동 중이어야 한다.)


- 유형이 고정으로 변경되었는지 확인한다.

Github 연동
- Github와 SSH를 연동하는 하려면 Secret을 Github Repo에 등록해야 한다.
- SSH 키 값을 생성한다.
- 이메일 주소는 구글 클라우드 계정을 입력한다.
- 먼저 Cloud Console을 연다.

- 클라우드 콘솔창에서 다음 명령어를 입력하고 실행한다. 이메일 주소는 구글 클라우드 계정을 입력한다.
ssh-keygen -t rsa -b 4096 -C your@email.com

- cat 명령어로 public key를 출력하고 이를 복사한다.
~$ cd ~/.ssh
~/.ssh$ cat id_rsa.pub

- Compute Engine > 설정 > 메타데이터 항목 > SSH 클릭 후, 복사한 SSH키를 추가한다.

- 다음 명령어로 public key를 authorized_keys로 복사를 한다.
~/.ssh$ cat id_rsa.pub >> authorized_keys
~/.ssh$ ls
authorized_keys  id_rsa  id_rsa.pub
Github Action 설정
- 이번에는 소스코드 Github 저장소로 이동한다.
- Github Repo를 생성한다.

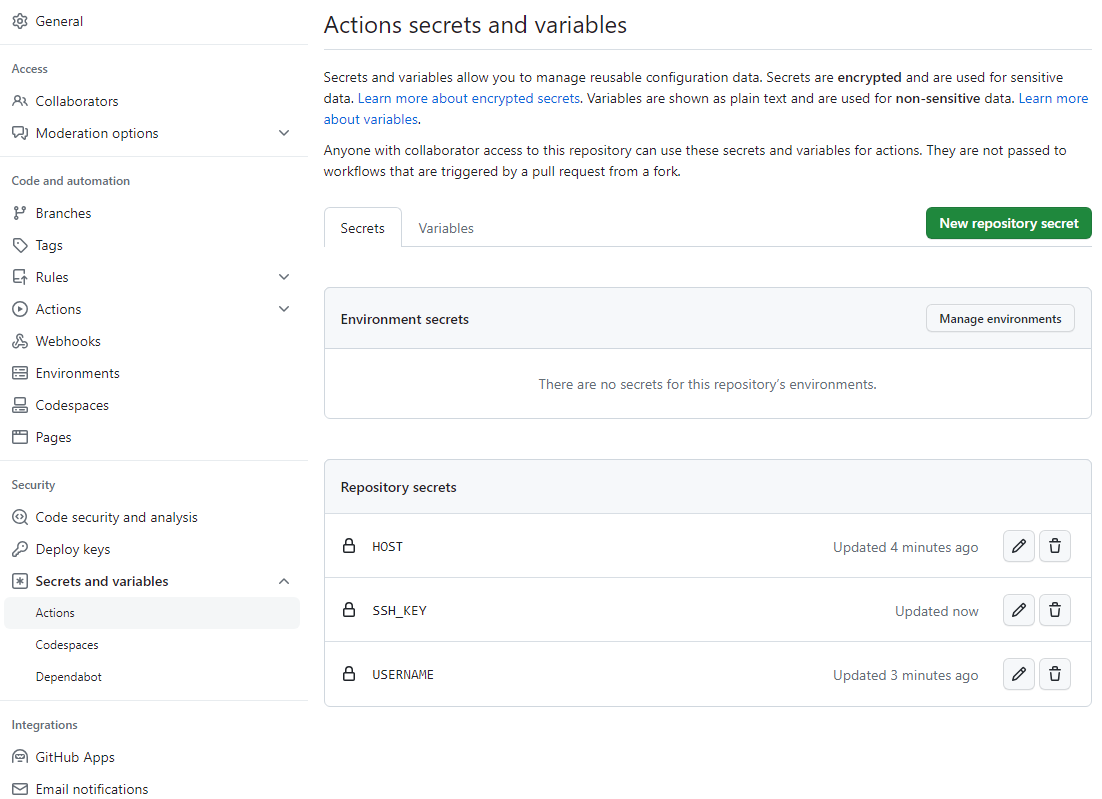
- 여기가 매우 중요하다!!! 생성한 Repo에서 Settings > Secrets and Variables > Actions로 이동한다.


-
위 화면에서
New Repository Secret버튼을 클릭한다.- HOST : 외부 Internal IP 주소를 입력한다.

- USERNAME : 터미널의 왼쪽 이름 abc@instance_name에서 abc만 입력한다.
- SSH_KEY : rsa private key를 복사한다. 복사할 때는
-----BEGIN OPENSSH PRIVATE KEY-----부터 시작해서-----END OPENSSH PRIVATE KEY-----까지 끝까지 복사를 한다.
~/.ssh$ cat id_rsa

-----BEGIN OPENSSH PRIVATE KEY-----
...
6CuPIoOv5UvQ0AAAEBAMMlPj1+gX+ZBnBELUwk2VPZxBcGdSWI9GHavQS1atrMcZ7nzc1V
+OS3S0hv76b+2DfnxgbHApZUasIVhRBUteIOlmoOuDrQV0IrSxFfjwjx6RVK2TgoNOu4qV
bEn4M8dG7i/bhBehIo1KFZCyQnBazlzDJiZ4Z5uxnCIAGuFhvhH+KMTplKakPs2287vAVt
lWmxuNoAiC5UNaY4f4jrGtmWgfaZ8BR586w4mSuzcjqtUQEPJMn3g9L7JzxwUYByZaHKLb
8TXppzfFBLgEC8UyY7LlgFS45cG4KF/opqSS6PehP15OT4DfTy/cXL1jSeV8i7ZlLCK63v
ciSzCmCs3NcAAAASamhqdW5nQGRzY2hsb2UuY29tAQ==
-----END OPENSSH PRIVATE KEY-----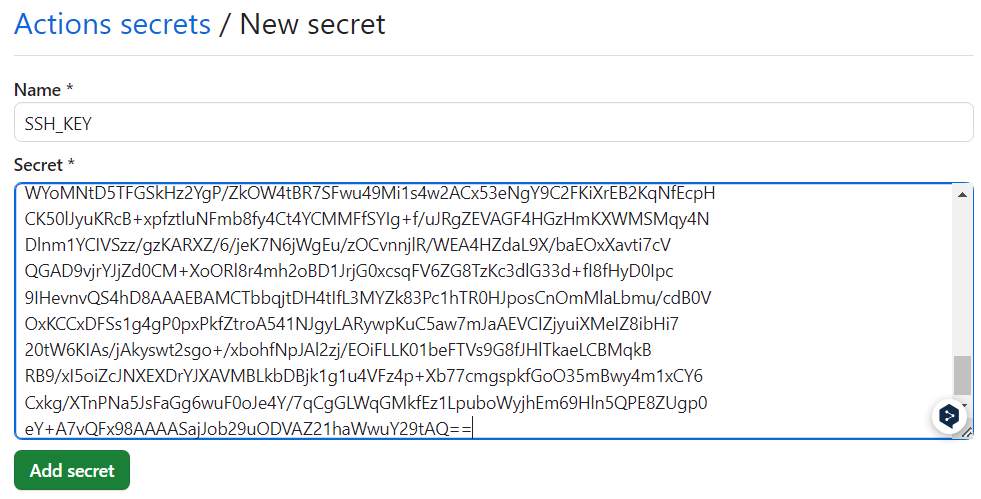
-
Github Action Secrets and Variables는 총 3개가 있어야 한다.
Github 연동
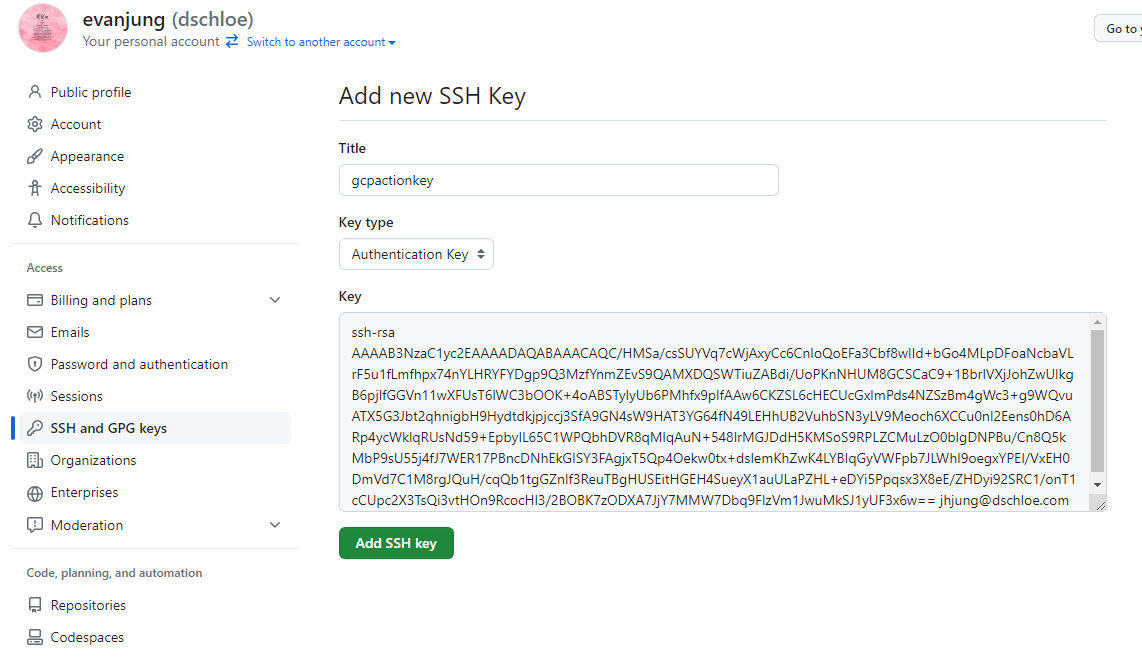
- Github Repo에 접근하려면 Profile > Settings > Access > SSH and GPG keys 순차적으로 입력한다.
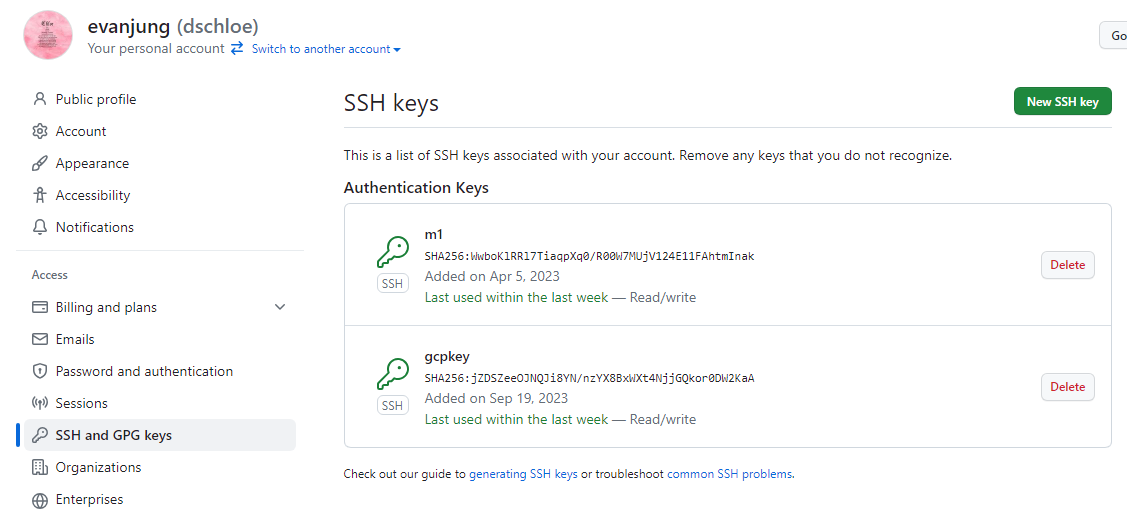
- New SSH Key 버튼을 클릭한다.
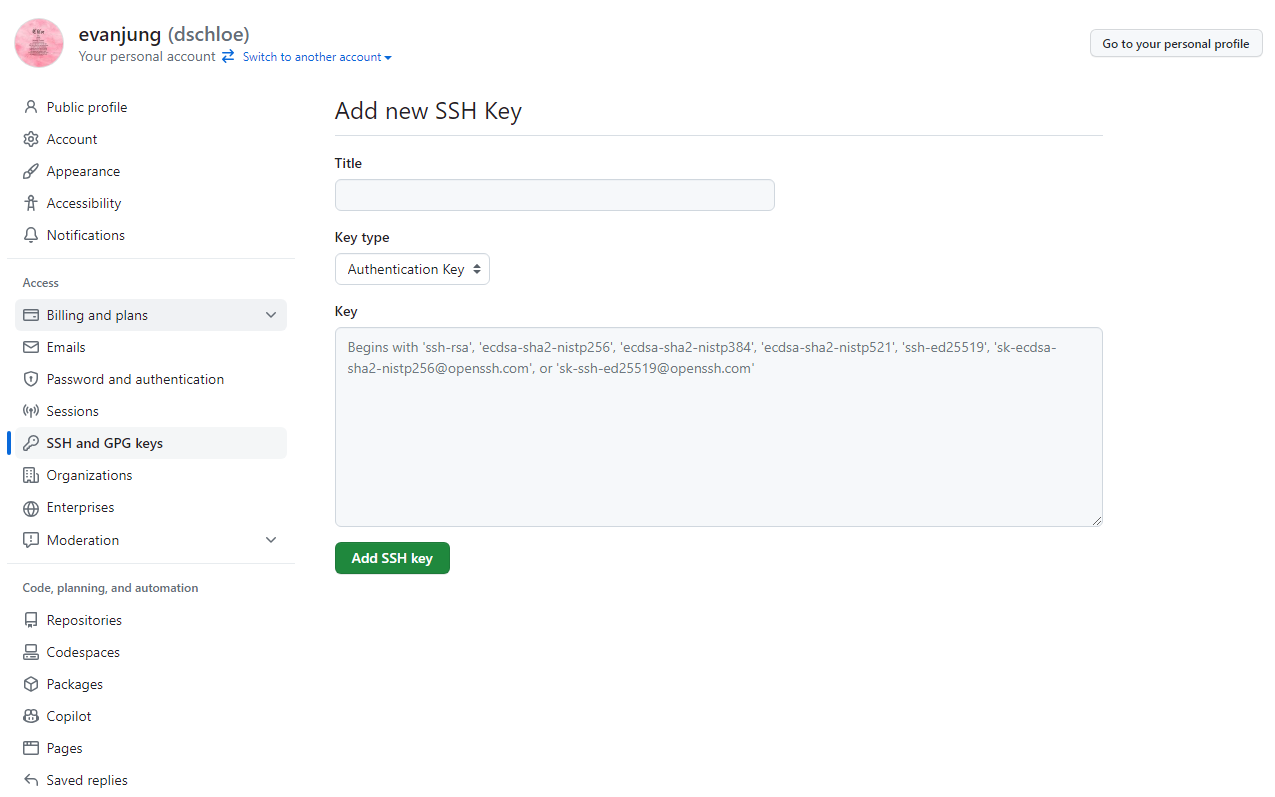
- 이 명령어를 실행하여 나온 키 값을 복사하여 Key 입력란에 추가한다.
~/.ssh$ cat id_rsa.pub
- 라이브러리 설치를 위해 경로를 SSH 시작 경로로 이동한다.
~/.ssh$ cd ~
~$ pwd
/home/your_id
Streamlit Deployment on Compute Engine
- 다음 명령어를 실행하여 miniconda를 설치한다. 설치가 종료된 이후 기존 브라우저 창을 종료한 후 다시 연다.
- 아래 명령어는 전체 복사해서 붙여 넣는다.
mkdir -p ~/miniconda3
wget https://repo.anaconda.com/miniconda/Miniconda3-latest-Linux-x86_64.sh -O ~/miniconda3/miniconda.sh
bash ~/miniconda3/miniconda.sh -b -u -p ~/miniconda3
rm -rf ~/miniconda3/miniconda.sh
~/miniconda3/bin/conda init bash
~/miniconda3/bin/conda init zsh
- 다음 명령어를 실행한다.
- git clone시 git@~ 으로 시작하는 주소를 입력해야 한다.
- 아래 명령어는 ~$ 제외한 나머지 코드를 입력한다.
- 중간에
Are you sure you want to continue connecting (yes/no/[fingerprint])질문이 나오면 yes를 한다.
~$ sudo apt-get update

~$ sudo apt install git
~$ git clone [your_repository url]
The authenticity of host 'github.com (20.200.245.247)' can't be established.
ECDSA key fingerprint is SHA256:p2QAMXNIC1TJYWeIOttrVc98/R1BUFWu3/LiyKgUfQM.
Are you sure you want to continue connecting (yes/no/[fingerprint])yes
Warning: Permanently added 'github.com,20.200.245.247' (ECDSA) to the list of known hosts.
remote: Enumerating objects: 4, done.
remote: Counting objects: 100% (4/4), done.
remote: Compressing objects: 100% (3/3), done.
remote: Total 4 (delta 0), reused 0 (delta 0), pack-reused 0
Receiving objects: 100% (4/4), done.
cd [your_repository]
~/streamlitActionTest$ pip install streamlit
~/streamlitActionTest$ git config --global credential.helper store
Sample Code
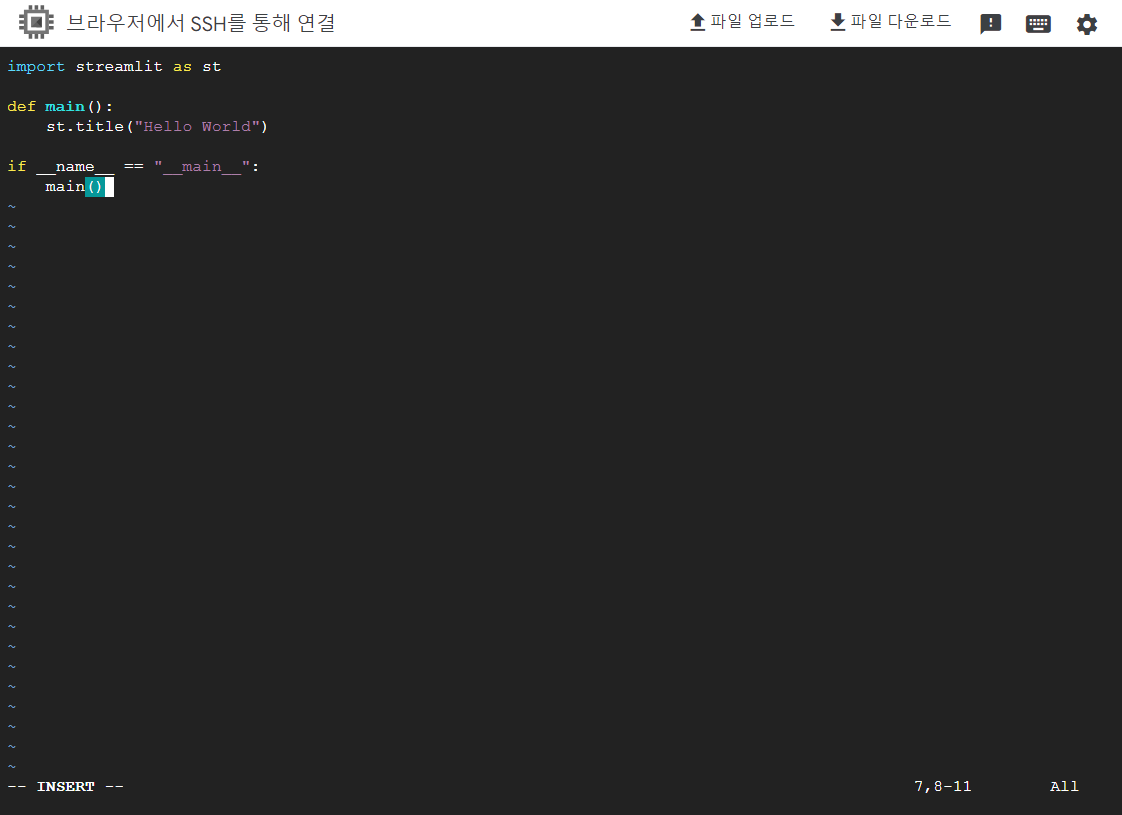
- 간단한
Streamlit code를 작성한다.
import streamlit as st

def main():
	st.title("Hello World")

if __name__ == "__main__":
	main()
- 이 코드는 vi 편집기로 추가한다. 파일명은 app.py
~/streamlitActionTest$ vi app.py
CI/CD 환경 만들기
- 간단한 Gitub Action 파일을 작성한다.
- 파일명은 deploy.sh 이다.
- deploy.sh 파일 내용은 아래와 같다. 정말 간단하다 단순히 main brach에서 푸시된 코드내용을 git pull 해서 내용을 업데이트 하는것 뿐이다.
- 마찬가지로 vi 편집기로 이용해서 작성한다.
~/streamlitActionTest$ vi deploy.sh
#!/bin/bash
git pull origin main
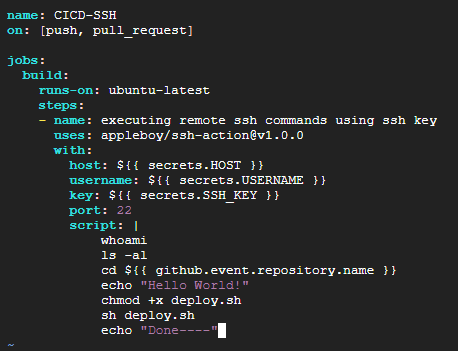
- 이번에는 Github Action 파일을 생성한다. (vi 편집기 사용)
- .github/workflows/streamlit.yml
~/streamlitActionTest$ mkdir .github
~/streamlitActionTest$ cd .github
~/streamlitActionTest/.github$ mkdir workflows
~/streamlitActionTest/.github$ cd workflows
~/streamlitActionTest/.github/workflows$ vi streamlit.yml
name: CICD-SSH
on: [push, pull_request]

jobs:
  build:
    runs-on: ubuntu-latest
    steps:
    - name: executing remote ssh commands using ssh key
      uses: appleboy/ssh-action@v1.0.0
      with:
        host: ${{ secrets.HOST }}
        username: ${{ secrets.USERNAME }}
        key: ${{ secrets.SSH_KEY }}
        port: 22
        script: |
            whoami
            ls -al
            cd ${{ github.event.repository.name }}
            echo "Hello World!"
            chmod +x deploy.sh
            sh deploy.sh
            echo "Done----"
Git Push
- 이제 Git Push를 진행해본다.
- 최초 진행 시, git login을 진행해야 한다.
- Github 계정과 username을 입력한다.
:~/streamlitActionTest$ git config --global user.email "you@example.com"
:~/streamlitActionTest$ git config --global user.name "Your Name"
- 모든 소스 코드 파일을 업로드 한다.
:~/streamlitActionTest$  git add .
:~/streamlitActionTest$  git commit -m "updated"
[main c70e742] updated
 3 files changed, 31 insertions(+)
 create mode 100644 .github/workflows/streamlit.yml
 create mode 100644 app.py
 create mode 100644 deploy.sh
:~/streamlitActionTest$  git push
Enumerating objects: 8, done.
Counting objects: 100% (8/8), done.
Delta compression using up to 2 threads
Compressing objects: 100% (4/4), done.
Writing objects: 100% (7/7), 908 bytes | 908.00 KiB/s, done.
Total 7 (delta 0), reused 0 (delta 0)
To github.com:dschloe/streamlitActionTest.git
   d60b2fa..c70e742  main -> main
Streamlit 실행
- Streamlit App을 nohup을 통해 실행한다.
~/streamlitActionTest$ nohup streamlit run app.py > streamlit.log 2>&1 &
[1] 2593
Action 실행
- Github로 와서 Action을 실행하도록 한다.
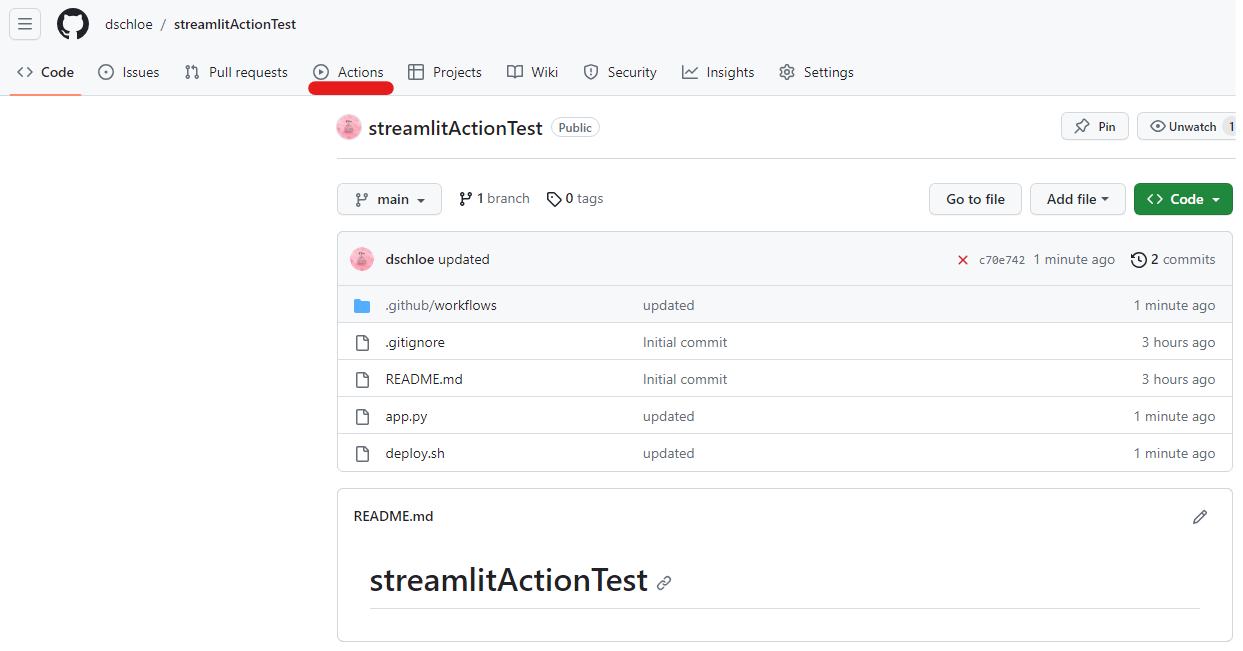
- CICD-SSH 버튼을 클릭하면 실행된다.

- 정상적으로 완료가 되면 아래와 같이 build에 성공 시그널이 오는 것을 확인할 수 있다.
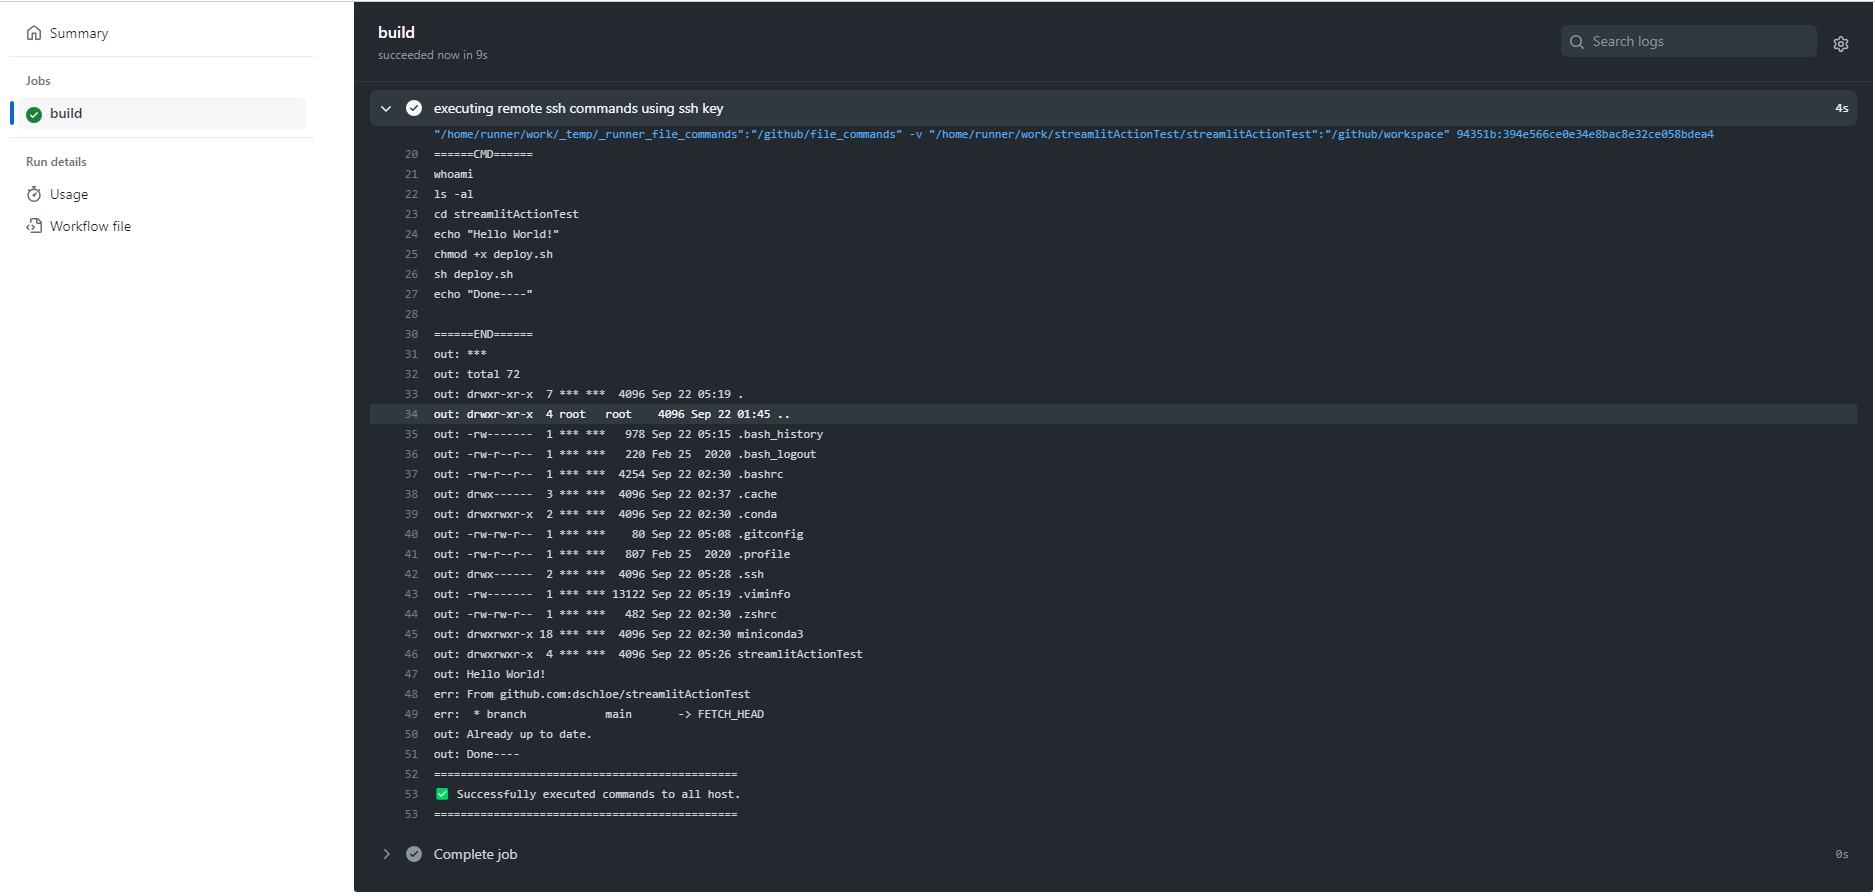
- 여기에서 에러가 난다면 크게 2가지를 변경해본다. 먼저, deploy.sh 파일을 실행할 수 있는 파일로 변경한다.
chmod +x deploy.sh
- github에서 직접 코드를 수정하고 Commit을 해본다.
로컬에서 코드 수정 후 업데이트 및 반영 확인
- 먼저 실행중인 Application에 들어간다.
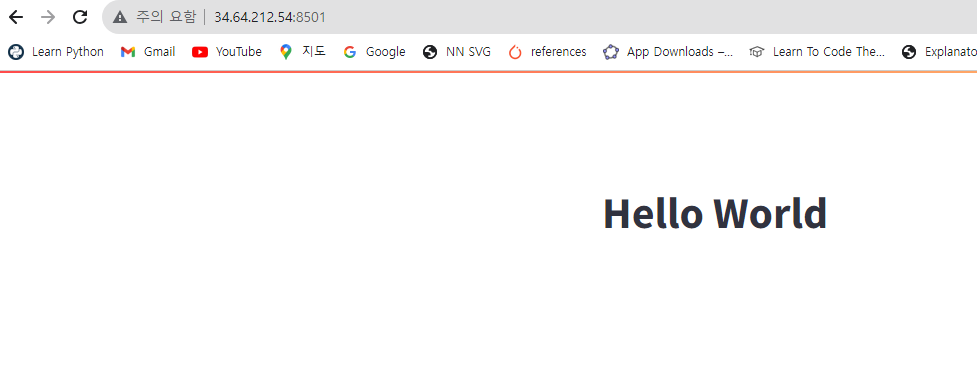
- github Repo를 로컬에서 다운로드 받은 후 코드를 아래와 같이 수정 후, 업그레이드를 한다.
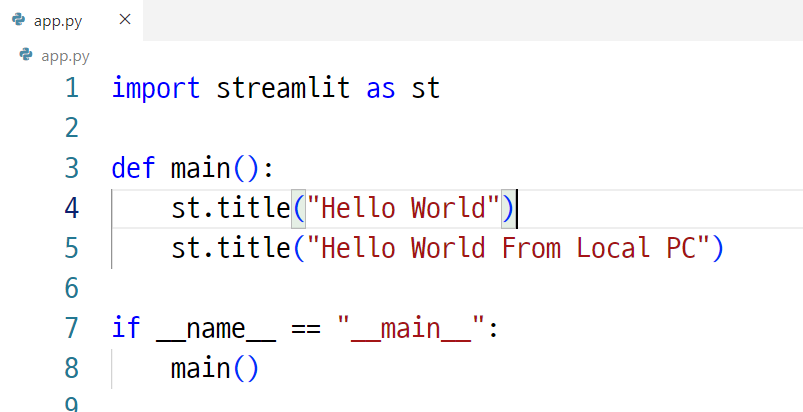
- github에서 코드가 업그레이드 된 것을 확인한다.

- 시간이 약 30초 정도 지난 후, 새로고침 하면 아래와 같이 웹 페이지가 업데이트가 된 것을 확인하도록 한다.

