Google Colab에서 Kaggle API 쉽게 사용하는 방법
한줄 요약
- 귀찮지만 한 2개의 Cell은 입력후 실행하자.
개요
- Google Colab에서 Kaggle을 사용하려면 보통 다음과 같은 과정을 거칩니다.
- 패키지 설치는 필수입니다.
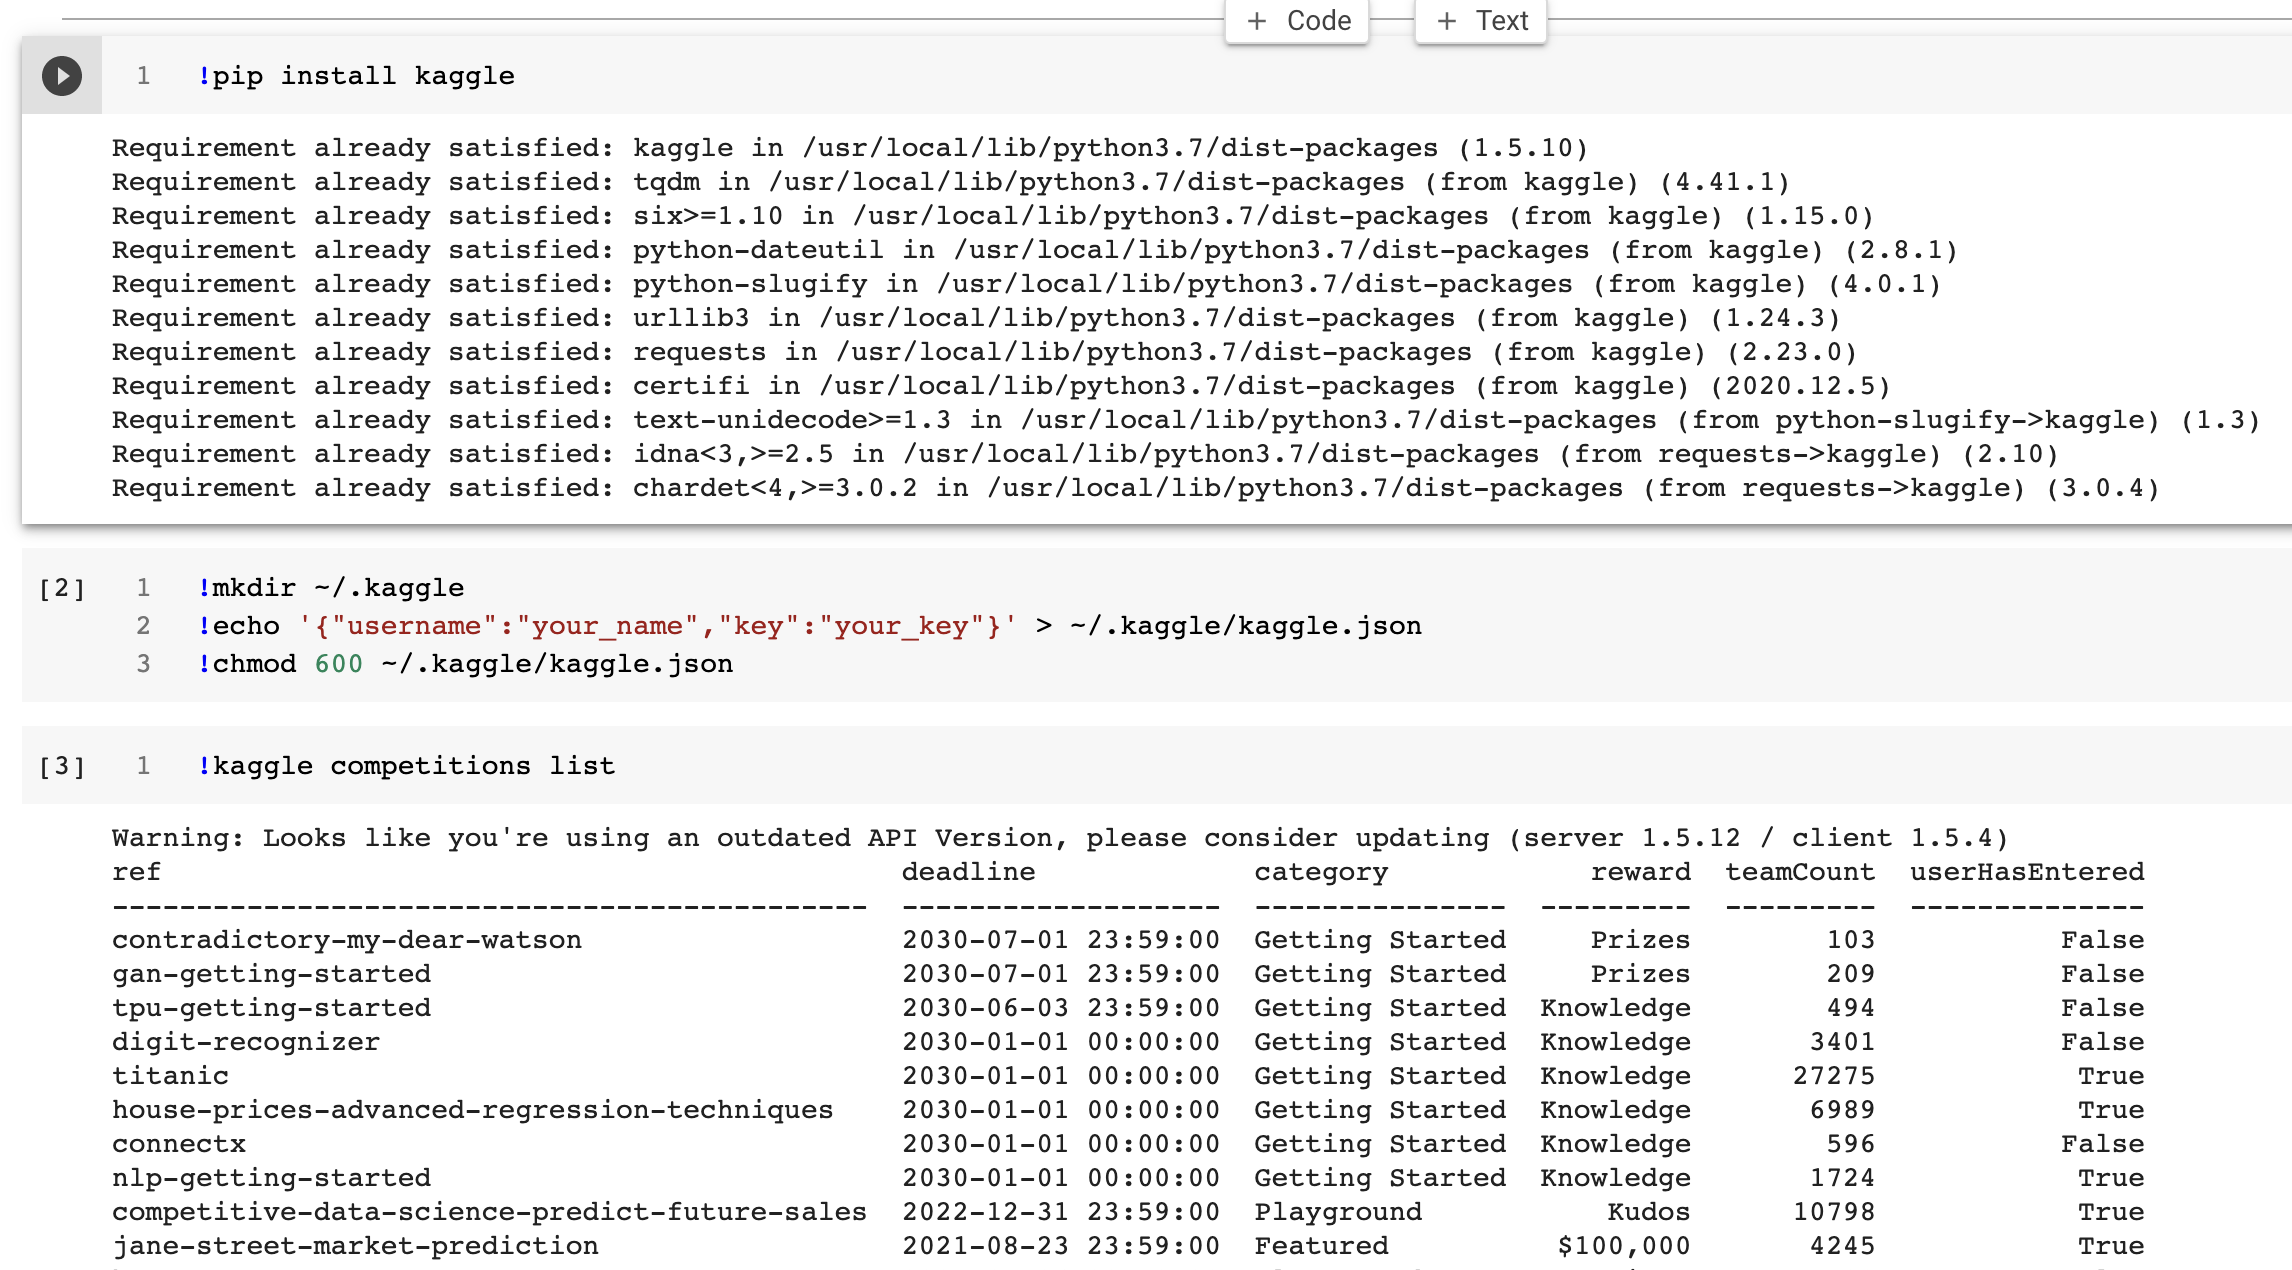
!pip install kaggle
Requirement already satisfied: kaggle in /usr/local/lib/python3.7/dist-packages (1.5.10)
Requirement already satisfied: python-dateutil in /usr/local/lib/python3.7/dist-packages (from kaggle) (2.8.1)
Requirement already satisfied: six>=1.10 in /usr/local/lib/python3.7/dist-packages (from kaggle) (1.15.0)
Requirement already satisfied: urllib3 in /usr/local/lib/python3.7/dist-packages (from kaggle) (1.24.3)
Requirement already satisfied: requests in /usr/local/lib/python3.7/dist-packages (from kaggle) (2.23.0)
Requirement already satisfied: tqdm in /usr/local/lib/python3.7/dist-packages (from kaggle) (4.41.1)
Requirement already satisfied: certifi in /usr/local/lib/python3.7/dist-packages (from kaggle) (2020.12.5)
Requirement already satisfied: python-slugify in /usr/local/lib/python3.7/dist-packages (from kaggle) (4.0.1)
Requirement already satisfied: chardet<4,>=3.0.2 in /usr/local/lib/python3.7/dist-packages (from requests->kaggle) (3.0.4)
Requirement already satisfied: idna<3,>=2.5 in /usr/local/lib/python3.7/dist-packages (from requests->kaggle) (2.10)
Requirement already satisfied: text-unidecode>=1.3 in /usr/local/lib/python3.7/dist-packages (from python-slugify->kaggle) (1.3)
문제점
- 아래 코드를 봅시다.
from google.colab import files

uploaded = files.upload()

for fn in uploaded.keys():
  print('User uploaded file "{name}" with length {length} bytes'.format(
      name=fn, length=len(uploaded[fn])))

# Then move kaggle.json into the folder where the API expects to find it.
!mkdir -p ~/.kaggle/ && mv kaggle.json ~/.kaggle/ && chmod 600 ~/.kaggle/kaggle.json
- 문제는 kaggle.json 파일을 매번 업로드 해줘야 하는데, 매우 번거롭습니다. 간혹 파일이 삭제되기도 합니다.
해결방법
- 이럴 때 간편한 방법은 위 방법 대신에 아래와 같이 입력을 하는 것입니다.
- key값은 kaggle.json 파일에 있습니다. 메모장 같은 텍스트 에디터나 파이참 같은 통합개발환경툴을 사용하면 바로 확인이 가능합니다.
!mkdir ~/.kaggle
!echo '{"username":"your_name","key":"your_key"}' > ~/.kaggle/kaggle.json
!chmod 600 ~/.kaggle/kaggle.json
mkdir: cannot create directory ‘/root/.kaggle’: File exists
- 실제 잘 되는지 확인해 봅니다.
!kaggle competitions list
Warning: Looks like you're using an outdated API Version, please consider updating (server 1.5.12 / client 1.5.4)
ref                                            deadline             category            reward  teamCount  userHasEntered
---------------------------------------------  -------------------  ---------------  ---------  ---------  --------------
contradictory-my-dear-watson                   2030-07-01 23:59:00  Getting Started     Prizes        102           False
gan-getting-started                            2030-07-01 23:59:00  Getting Started     Prizes        209           False
tpu-getting-started                            2030-06-03 23:59:00  Getting Started  Knowledge        493           False
digit-recognizer                               2030-01-01 00:00:00  Getting Started  Knowledge       3394           False
titanic                                        2030-01-01 00:00:00  Getting Started  Knowledge      27213            True
house-prices-advanced-regression-techniques    2030-01-01 00:00:00  Getting Started  Knowledge       6963            True
connectx                                       2030-01-01 00:00:00  Getting Started  Knowledge        595           False
nlp-getting-started                            2030-01-01 00:00:00  Getting Started  Knowledge       1723            True
competitive-data-science-predict-future-sales  2022-12-31 23:59:00  Playground           Kudos      10797            True
jane-street-market-prediction                  2021-08-23 23:59:00  Featured          $100,000       4245            True
hungry-geese                                   2021-07-26 23:59:00  Playground          Prizes        423           False
coleridgeinitiative-show-us-the-data           2021-06-22 23:59:00  Featured           $90,000        188           False
bms-molecular-translation                      2021-06-02 23:59:00  Featured           $50,000        350           False
iwildcam2021-fgvc8                             2021-05-26 23:59:00  Research         Knowledge         11           False
herbarium-2021-fgvc8                           2021-05-26 23:59:00  Research         Knowledge         30           False
plant-pathology-2021-fgvc8                     2021-05-26 23:59:00  Research         Knowledge        121           False
hotel-id-2021-fgvc8                            2021-05-26 23:59:00  Research         Knowledge         26           False
hashcode-2021-oqr-extension                    2021-05-25 23:59:00  Playground       Knowledge        101           False
indoor-location-navigation                     2021-05-17 23:59:00  Research           $10,000        734           False
hpa-single-cell-image-classification           2021-05-11 23:59:00  Featured           $25,000        432           False
- 만약, kaggle json 파일을 새로 받았다면? 당연한 말이지만, 위
key값도 새로 입력해줘야 합니다. - 아래 코드를 확인해본다.
귀찮지만, 두개의
Cell은 실행합시다. 작은 도움이 되기를 바랍니다.Happy to Code