강의 홍보
개요
- One-Hot Encoding 개념에 대해 이해한다.
- One-Hot Encoder 사용법을 익힌다.
One-Hot Encoding
- One-Hot Encoding은 문자를 숫자로 변환하는 것이다.
- 먼저 그림을 보면서 이해하도록 한다.
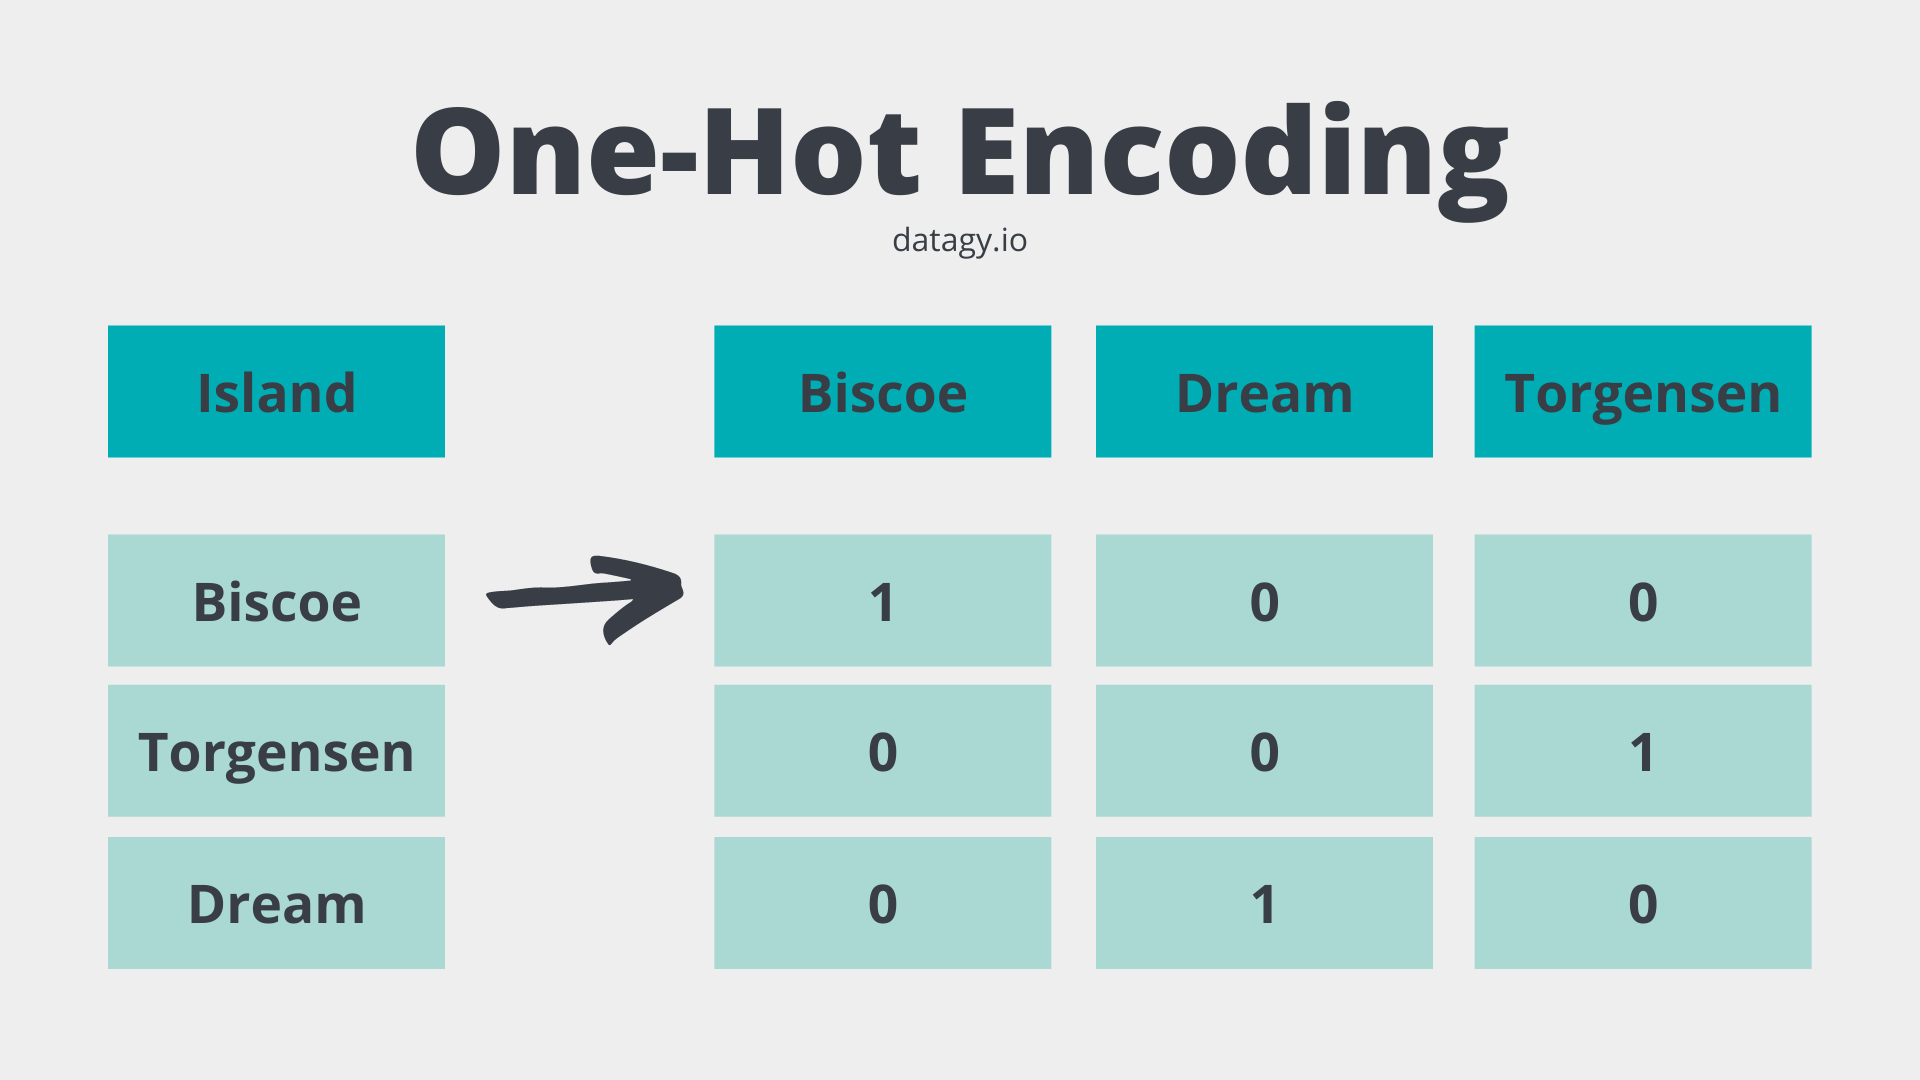
- 머신러닝 알고리즘은 데이터가 모두 숫자인 것으로 이해하기 때문에 모두 변환해주어야 한다.
OnetHotEncoder
- OneHotEncoder는 Scikit-Learn 라이브러리에 있는 클래스이다.
- 먼저 예시를 참조한다.
import sklearn
print("sklearn ver.", sklearn.__version__)
sklearn ver. 1.0.2
from sklearn.preprocessing import OneHotEncoder
enc = OneHotEncoder(handle_unknown='ignore')
X = [['Male', 1], ['Female', 3], ['Female', 2]]
enc.fit_transform(X).toarray()
array([[0., 1., 1., 0., 0.],
       [1., 0., 0., 0., 1.],
       [1., 0., 0., 1., 0.]])
- 예시 코드를 보면 위 그림과 결괏값이 다르게 나오는 걸 확인할 수 있다.
- 보통 우리가 다루는 데이터는 pandas 데이터프레임이기 때문에, 입문자분들에게는 거리감이 느껴질 수 있다.
- 그래서 pandas 데이터프레임 데이터를 가져와서 테스트를 해보았다.
from sklearn.preprocessing import OneHotEncoder
from seaborn import load_dataset
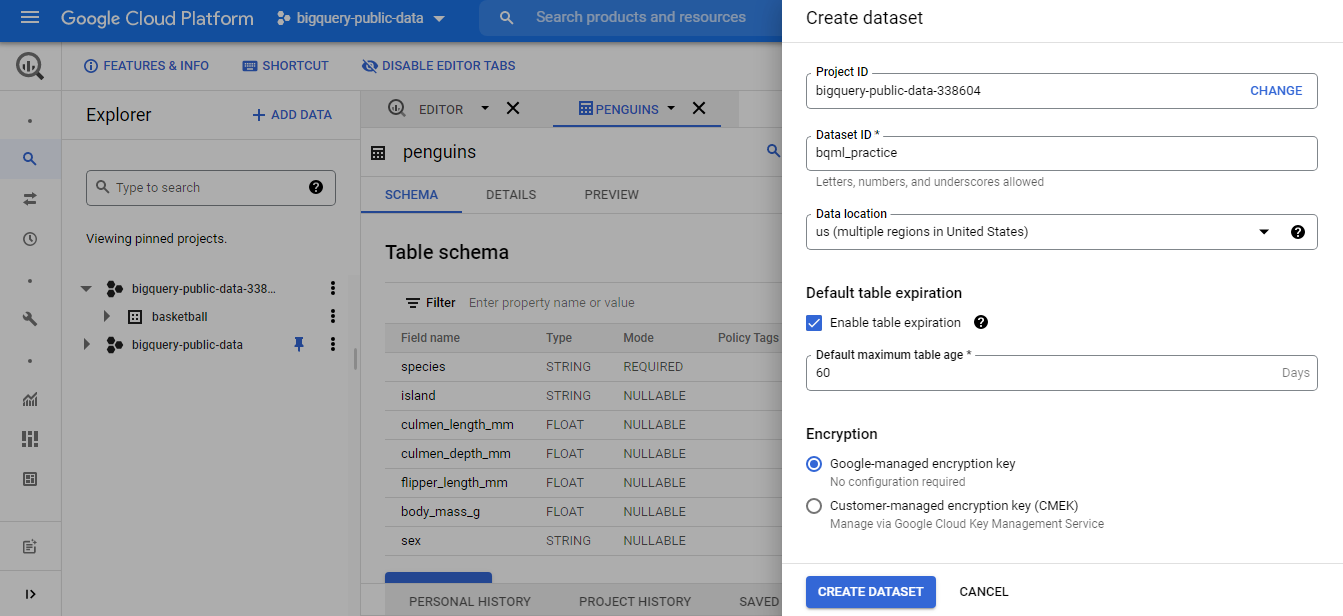
penguins = load_dataset('penguins')
ohe = OneHotEncoder()
transformed = ohe.fit_transform(penguins[['island']])
print(transformed.toarray())
print(ohe.categories_)
print(penguins['island'].unique())
[[0. 0. 1.]
 [0. 0. 1.]
 [0. 0. 1.]
 ...
 [1. 0. 0.]
 [1. 0. 0.]
 [1. 0. 0.]]
[array(['Biscoe', 'Dream', 'Torgersen'], dtype=object)]
['Torgersen' 'Biscoe' 'Dream']
- 이제 해당 코드를 기존 데이터프레임에 추가하도록 한다.
  species     island  bill_length_mm  bill_depth_mm  flipper_length_mm  \
0  Adelie  Torgersen            39.1           18.7              181.0
1  Adelie  Torgersen            39.5           17.4              186.0
2  Adelie  Torgersen            40.3           18.0              195.0
3  Adelie  Torgersen             NaN            NaN                NaN
4  Adelie  Torgersen            36.7           19.3              193.0

   body_mass_g     sex
0       3750.0    Male
1       3800.0  Female
2       3250.0  Female
3          NaN     NaN
4       3450.0  Female
penguins[ohe.categories_[0]] = transformed.toarray()
print(penguins.head())
  species     island  bill_length_mm  bill_depth_mm  flipper_length_mm  \
0  Adelie  Torgersen            39.1           18.7              181.0
1  Adelie  Torgersen            39.5           17.4              186.0
2  Adelie  Torgersen            40.3           18.0              195.0
3  Adelie  Torgersen             NaN            NaN                NaN
4  Adelie  Torgersen            36.7           19.3              193.0

   body_mass_g     sex  Biscoe  Dream  Torgersen
0       3750.0    Male     0.0    0.0        1.0
1       3800.0  Female     0.0    0.0        1.0
2       3250.0  Female     0.0    0.0        1.0
3          NaN     NaN     0.0    0.0        1.0
4       3450.0  Female     0.0    0.0        1.0
만약 다중 문자열 컬럼을 한다면?
- 위 예시는 변경하려는 컬럼이 1개일 때는 시의적절하게 사용할 수 있다.
- 그러나, 보통 캐글이나 데이콘 같은 대회에서는 여러개의 문자열 컬럼을 변환시켜야 한다.
- 물론, 프로그래밍 능력을 갖춘 분이라면, 반복문을 사용해서 처리할 수도 있다.
- 그러나, sklearn.compose.make_column_transformer 클래스를 활용하면 보다 쉽게 처리할 수 있다.
from sklearn.preprocessing import OneHotEncoder
from sklearn.preprocessing import LabelEncoder
from sklearn.compose import make_column_transformer
from seaborn import load_dataset
import pandas as pd

penguins = load_dataset('penguins')
sample_cols = ['island', 'sex', 'bill_length_mm', 'species']
penguins = penguins[sample_cols]

# 결측치 제거
penguins = penguins.dropna()
print(penguins.head())
print(penguins.info())
      island     sex  bill_length_mm species
0  Torgersen    Male            39.1  Adelie
1  Torgersen  Female            39.5  Adelie
2  Torgersen  Female            40.3  Adelie
4  Torgersen  Female            36.7  Adelie
5  Torgersen    Male            39.3  Adelie
<class 'pandas.core.frame.DataFrame'>
Int64Index: 333 entries, 0 to 343
Data columns (total 4 columns):
 #   Column          Non-Null Count  Dtype
---  ------          --------------  -----
 0   island          333 non-null    object
 1   sex             333 non-null    object
 2   bill_length_mm  333 non-null    float64
 3   species         333 non-null    object
dtypes: float64(1), object(3)
memory usage: 13.0+ KB
None
categorical_cols = ['island', 'sex']
label_cols = ['species']

transformer = make_column_transformer(
    (OneHotEncoder(), categorical_cols),
    remainder='passthrough',
    verbose_feature_names_out = False)

transformed = transformer.fit_transform(penguins)
transformed_df = pd.DataFrame(transformed, columns=transformer.get_feature_names_out())
print(transformed_df.head())
  island_Biscoe island_Dream island_Torgersen sex_Female sex_Male  \
0           0.0          0.0              1.0        0.0      1.0
1           0.0          0.0              1.0        1.0      0.0
2           0.0          0.0              1.0        1.0      0.0
3           0.0          0.0              1.0        1.0      0.0
4           0.0          0.0              1.0        0.0      1.0

  bill_length_mm species
0           39.1  Adelie
1           39.5  Adelie
2           40.3  Adelie
3           36.7  Adelie
4           39.3  Adelie
OrdinalEncoder 클래스와 같이 사용이 가능한가?
- 이번에는 OrdinalEncoder 클래스와 같이 사용을 하도록 한다.
import pandas as pd
from seaborn import load_dataset

tips = load_dataset('tips')

# 결측치 제거
tips = tips.dropna()
print(tips.info())
<class 'pandas.core.frame.DataFrame'>
Int64Index: 244 entries, 0 to 243
Data columns (total 7 columns):
 #   Column      Non-Null Count  Dtype
---  ------      --------------  -----
 0   total_bill  244 non-null    float64
 1   tip         244 non-null    float64
 2   sex         244 non-null    category
 3   smoker      244 non-null    category
 4   day         244 non-null    category
 5   time        244 non-null    category
 6   size        244 non-null    int64
dtypes: category(4), float64(2), int64(1)
memory usage: 9.1 KB
None
- 위 데이터에서 sex, day는 onehot encoding을 진행하고, smoker와 time은 ordinal encoding을 동시 진행해본다.
- 또한, numeric features를 위해 스케일러도 진행했다.
- 그 후, 새로운 데이터 프레임으로 변환하는 코드를 작성한다.
- ColumnTransformer 메서드 적용 후, get_feature_names()를 얻기 위해서는 helper 함수가 필요하다.
import warnings
import sklearn
import pandas as pd
import numpy as np

def get_feature_names(column_transformer):
    """Get feature names from all transformers.
    Returns
    -------
    feature_names : list of strings
        Names of the features produced by transform.
    """
    # Remove the internal helper function
    #check_is_fitted(column_transformer)

    # Turn loopkup into function for better handling with pipeline later
    def get_names(trans):
        # >> Original get_feature_names() method
        if trans == 'drop' or (
                hasattr(column, '__len__') and not len(column)):
            return []
        if trans == 'passthrough':
            if hasattr(column_transformer, '_df_columns'):
                if ((not isinstance(column, slice))
                        and all(isinstance(col, str) for col in column)):
                    return column
                else:
                    return column_transformer._df_columns[column]
            else:
                indices = np.arange(column_transformer._n_features)
                return ['x%d' % i for i in indices[column]]
        if not hasattr(trans, 'get_feature_names'):
        # >>> Change: Return input column names if no method avaiable
            # Turn error into a warning
            warnings.warn("Transformer %s (type %s) does not "
                                 "provide get_feature_names. "
                                 "Will return input column names if available"
                                 % (str(name), type(trans).__name__))
            # For transformers without a get_features_names method, use the input
            # names to the column transformer
            if column is None:
                return []
            else:
                return [name + "__" + f for f in column]

        return [name + "__" + f for f in trans.get_feature_names()]

    ### Start of processing
    feature_names = []

    # Allow transformers to be pipelines. Pipeline steps are named differently, so preprocessing is needed
    if type(column_transformer) == sklearn.pipeline.Pipeline:
        l_transformers = [(name, trans, None, None) for step, name, trans in column_transformer._iter()]
    else:
        # For column transformers, follow the original method
        l_transformers = list(column_transformer._iter(fitted=True))


    for name, trans, column, _ in l_transformers:
        if type(trans) == sklearn.pipeline.Pipeline:
            # Recursive call on pipeline
            _names = get_feature_names(trans)
            # if pipeline has no transformer that returns names
            if len(_names)==0:
                _names = [name + "__" + f for f in column]
            feature_names.extend(_names)
        else:
            feature_names.extend(get_names(trans))

    return feature_names
- 이제 위 함수들을 적용해서 각 인코딩과 사용하지 않는 컬럼들을 하나로 합치는 코드를 작성해본다.
from sklearn.preprocessing import OneHotEncoder
from sklearn.preprocessing import OrdinalEncoder
from sklearn.preprocessing import StandardScaler
from sklearn.compose import ColumnTransformer
from sklearn.pipeline import Pipeline

categorical_cols = ['sex', 'day']
ordinal_cols = ['smoker', 'time']
numeric_cols = ['total_bill']
keep_features = [x for x in tips.columns if x not in categorical_cols + ordinal_cols + numeric_cols]

tips2 = tips[categorical_cols + ordinal_cols + numeric_cols]

transformer = ColumnTransformer(
    [('StandardScaler', StandardScaler(), numeric_cols),
     ('OneHotEncoder', OneHotEncoder(), categorical_cols),
     ('OrdinalEncoder', OrdinalEncoder(), ordinal_cols)],
    remainder='passthrough',
    verbose_feature_names_out = False)

transformed = transformer.fit_transform(tips2)
transformed_df = pd.DataFrame(transformed, columns=get_feature_names(transformer))
tip3 = pd.concat([tips[keep_features], transformed_df], axis = 1)
tip3.info()
<class 'pandas.core.frame.DataFrame'>
Int64Index: 244 entries, 0 to 243
Data columns (total 11 columns):
 #   Column                      Non-Null Count  Dtype
---  ------                      --------------  -----
 0   tip                         244 non-null    float64
 1   size                        244 non-null    int64
 2   StandardScaler__total_bill  244 non-null    float64
 3   OneHotEncoder__x0_Female    244 non-null    float64
 4   OneHotEncoder__x0_Male      244 non-null    float64
 5   OneHotEncoder__x1_Fri       244 non-null    float64
 6   OneHotEncoder__x1_Sat       244 non-null    float64
 7   OneHotEncoder__x1_Sun       244 non-null    float64
 8   OneHotEncoder__x1_Thur      244 non-null    float64
 9   OrdinalEncoder__smoker      244 non-null    float64
 10  OrdinalEncoder__time        244 non-null    float64
dtypes: float64(10), int64(1)
memory usage: 22.9 KB


/usr/local/lib/python3.7/dist-packages/ipykernel_launcher.py:38: UserWarning: Transformer StandardScaler (type StandardScaler) does not provide get_feature_names. Will return input column names if available
/usr/local/lib/python3.7/dist-packages/sklearn/utils/deprecation.py:87: FutureWarning: Function get_feature_names is deprecated; get_feature_names is deprecated in 1.0 and will be removed in 1.2. Please use get_feature_names_out instead.
  warnings.warn(msg, category=FutureWarning)
/usr/local/lib/python3.7/dist-packages/ipykernel_launcher.py:38: UserWarning: Transformer OrdinalEncoder (type OrdinalEncoder) does not provide get_feature_names. Will return input column names if available
- 일단 임시로 작업을 하기는 했으나, 뭔가 깔끔해보이지는 않는다.
- 만약 작업을 한다면, 한꺼번에 하지 말고, 각 단계별로 pipeline을 구성 후, 순차적으로 하는 것이 현재로써는 좀 더 “정신건강상 좋아보인다!”