Scrapy Tutorial - 다중페이지 크롤링
Page content
개요
- 이번에는 Scrapy를 통해서 다중 페이지를 크롤링 하도록 한다.
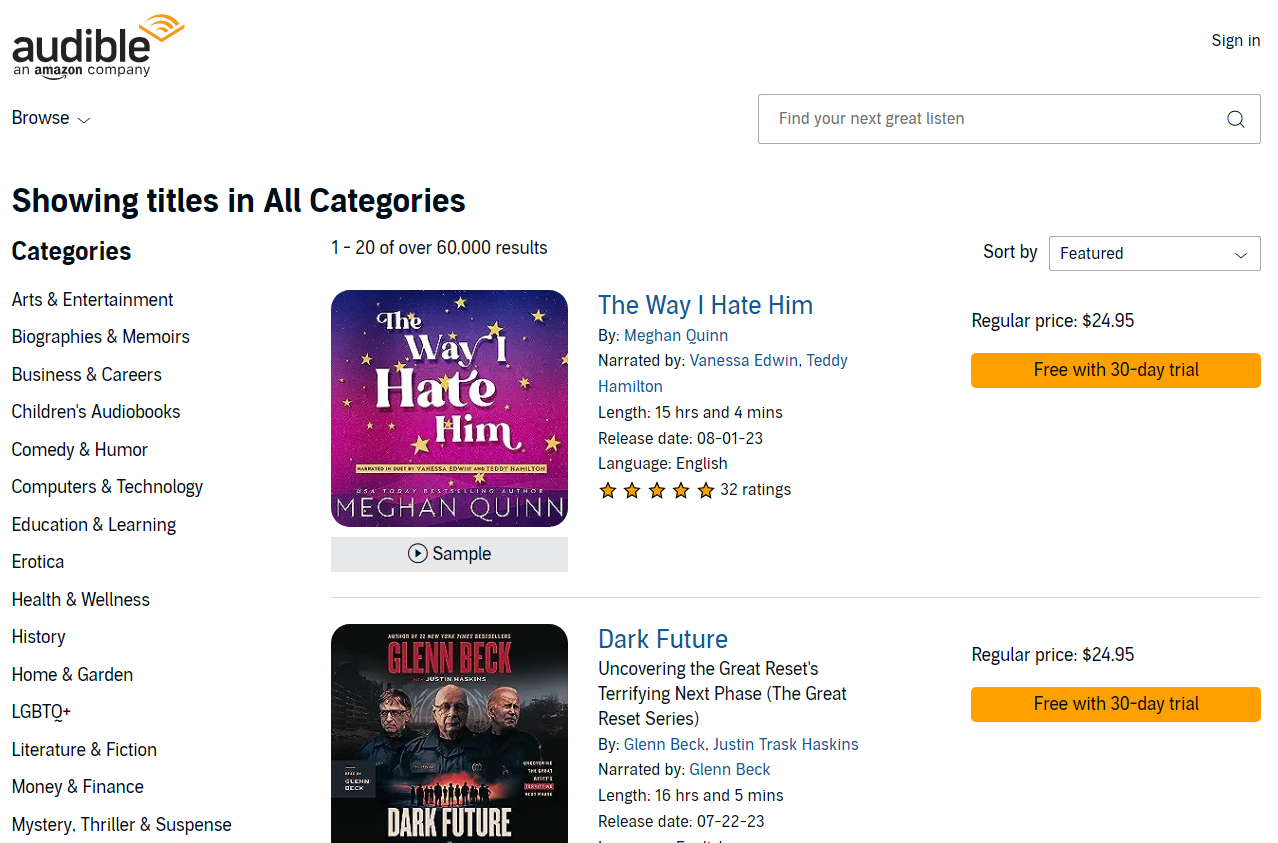
Target 페이지
- 타겟 웹사이트 : https://www.audible.com/search
프로젝트 시작
- 프로젝트 시작은 다음과 같이 할 수 있다.
$ scrapy startproject multiCam_tutorial
New Scrapy project 'multiCam_tutorial', using template directory 'C:\Users\j2hoo\OneDrive\Desktop\your_project_folder\venv\Lib\site-packages\scrapy\templates\project', created in:
    C:\Users\j2hoo\OneDrive\Desktop\your_path\multiCam_tutorial

You can start your first spider with:
    cd multiCam_tutorial
    scrapy genspider example example.com
- 해당 multiCam_tutorial 경로에서 다음 명령어를 실행하여 타겟 사이트를 설정한다.
$ scrapy genspider audible www.audible.com/search
Created spider 'audible' using template 'basic' in module:
  multiCam_tutorial.spiders.audible
audible.py 파일을 찾아 코드를 확인한다.
import scrapy

class AudibleSpider(scrapy.Spider):
    name = "audible"
    allowed_domains = ["www.audible.com"]
    start_urls = ["https://www.audible.com/search"]

    def parse(self, response):
        pass
웹사이트 분석
- 페이지에서 전체 책 리스트를 포함하고 있는 div 태그를 찾는다.
- 이를 XPath 코드로 변환하여 확인한다. (Ctrl + F)
//div[@class="adbl-impression-container "]
/div/span[2]/ul/li코드를 추가하면 20개의 element가 발견되는 것을 확인할 수 있다.
//div[@class="adbl-impression-container "]/div/span[2]/ul/li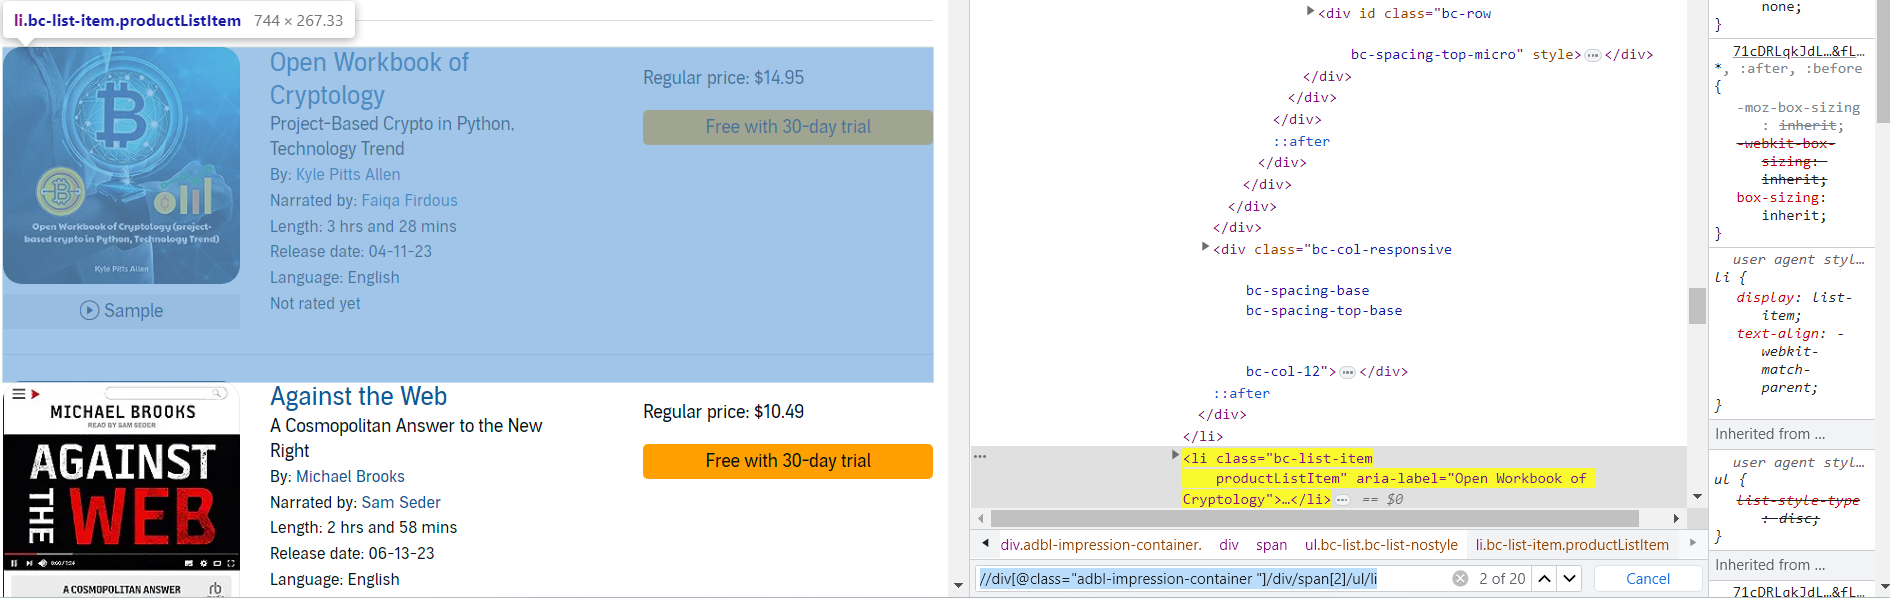
1 페이지 데이터 조회
각 li 태그에 담겨 있는 데이터를 가져오도록 한다.
audible.py 코드를 수정한다.
- 기존
import scrapy class AudibleSpider(scrapy.Spider): name = "audible" allowed_domains = ["www.audible.com"] start_urls = ["https://www.audible.com/search"] def parse(self, response): pass- 수정
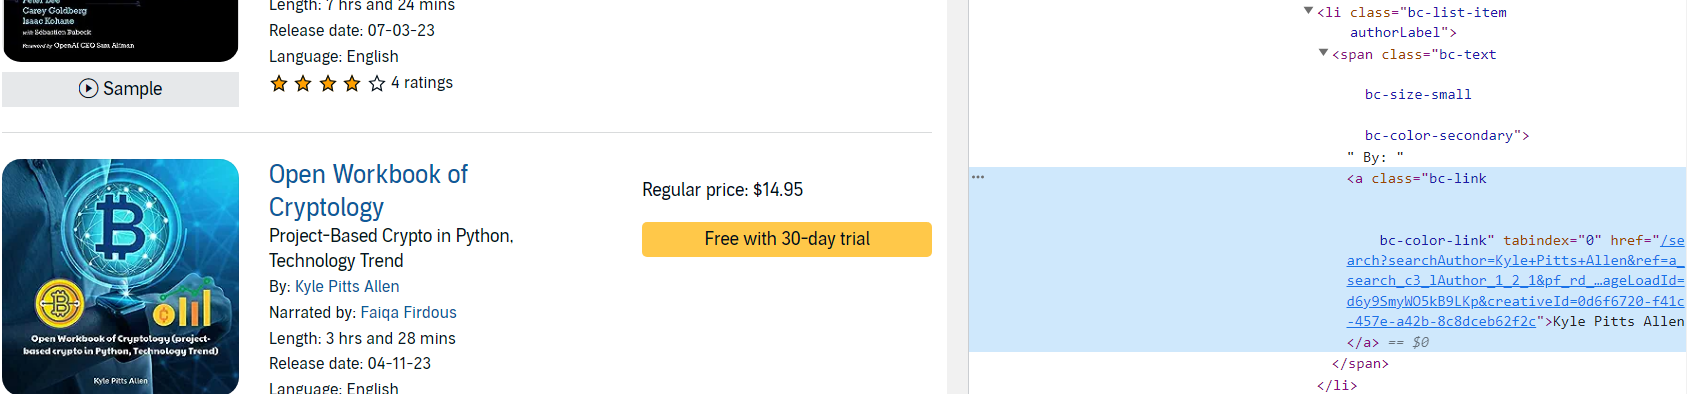
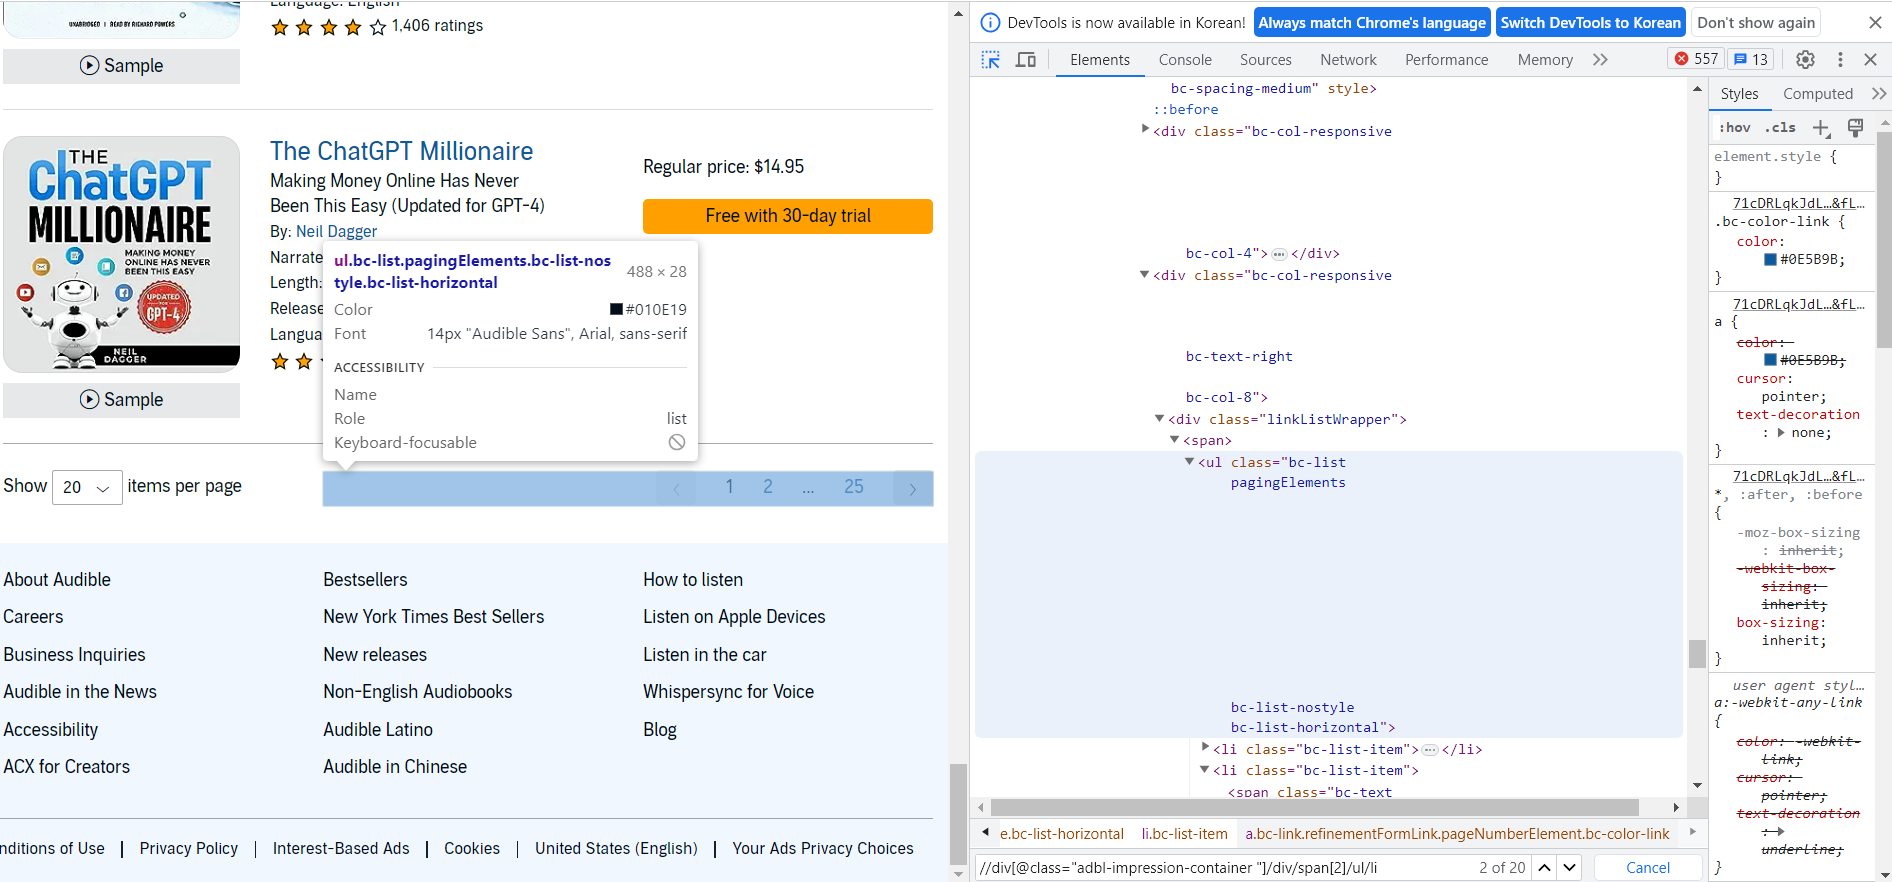
- Author 이름을 가져오려면 먼저 아래 이미지 처럼 li > span > a 순서대로 xpath 코드를 추가해야 한다.
- li 클래스 이름은 authorLabel이다.
import scrapy

class AudibleSpider(scrapy.Spider):
    name = "audible"
    allowed_domains = ["www.audible.com"]
    start_urls = ["https://www.audible.com/search"]

    def parse(self, response):
        product_container = response.xpath('//div[@class="adbl-impression-container "]/div/span[2]/ul/li')

        for product in product_container:
            book_title = product.xpath('.//h3[contains(@class, "bc-heading")]/a/text()').get()

		        # 몇몇 도서의 저자는 2명이기도 하다.
            book_author = product.xpath('.//li[contains(@class, "authorLabel")]/span/a/text()').getall()

            # 책의 길이
            book_length = product.xpath('.//li[contains(@class, "runtimeLabel")]/span/text()').get

            yield {
                'title' : book_title,
                'author' : book_author,
                'length' : book_length
            }
이제 scrapy 명령어를 실행하여 전체 데이터가 잘 출력되는지 확인한다.
scrapy crawl audible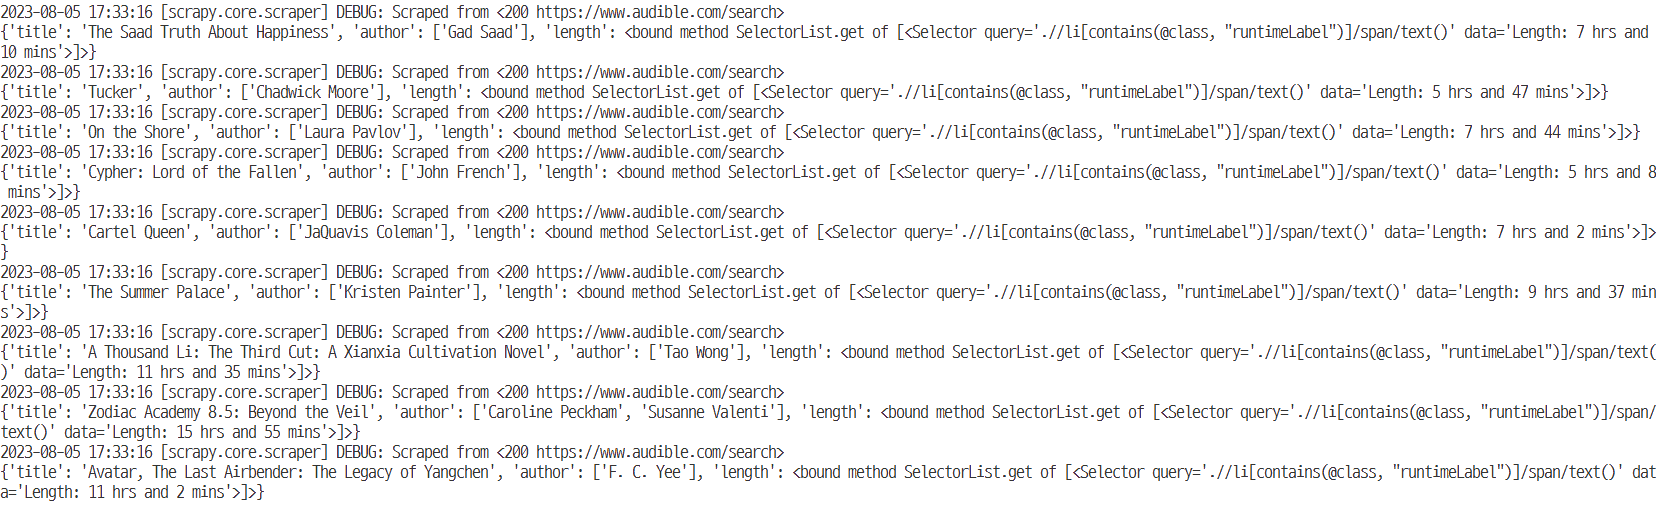
- 해당 코드를 이제 csv 파일로 내보낸다.
scrapy crawl audible -o audible_onepage.csv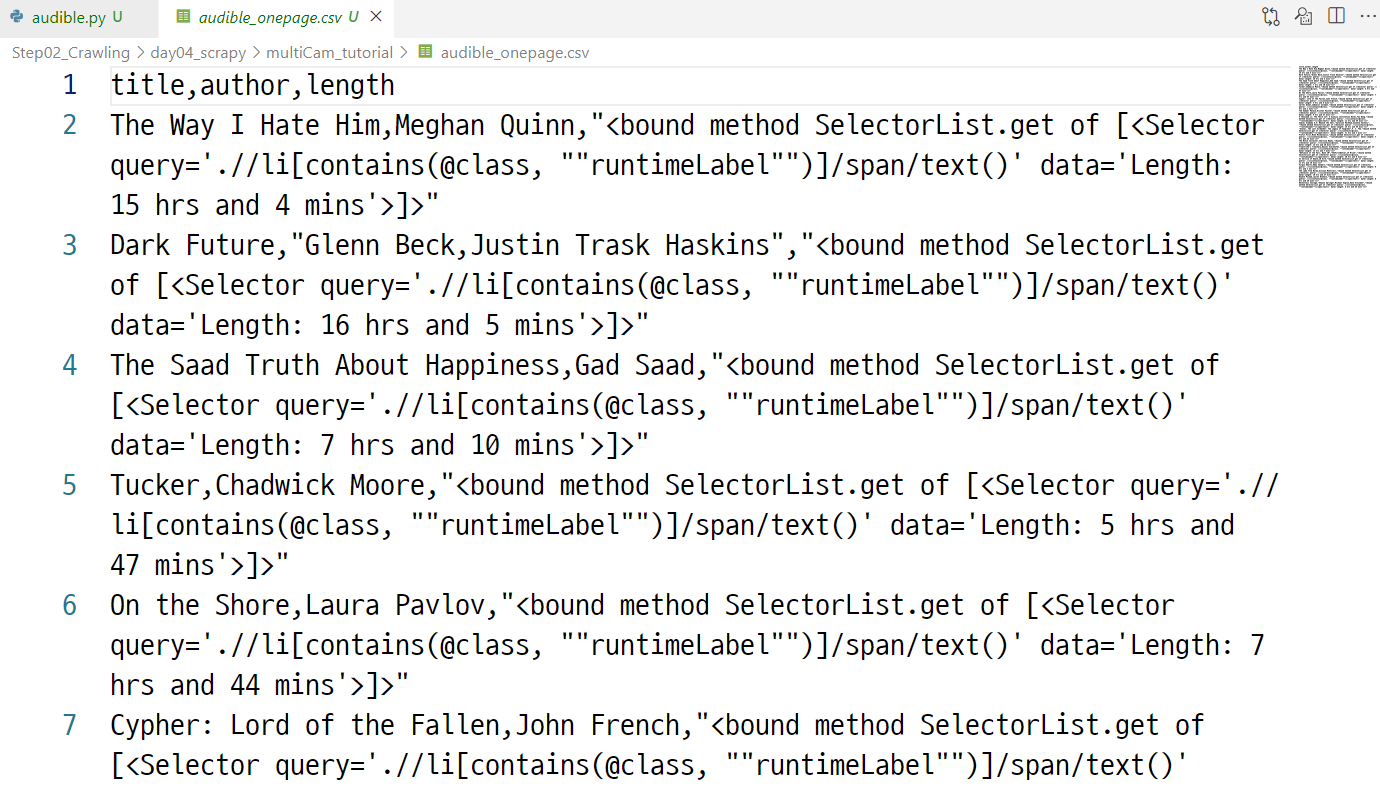
다중 페이지 조회 (Pagination)
- 다중 페이지를 조회하기 위해서는 웹사이트 분석을 다시 해야 한다.
- 먼저 각 page 번호는 ul > li 태그로 구성되어 있는 것을 확인할 수 있다.
- 이제 page 관련 ul 태그에 접근할 수 있도록 xpath 문법을 수정한다.
//ul[contains(@class, "pagingElements")]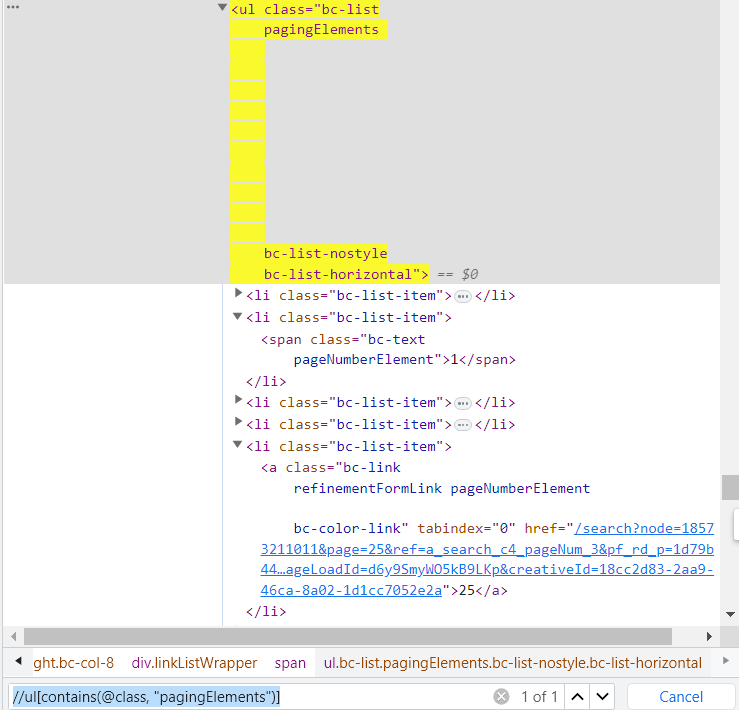
- 두번째로 확인해야 할 것은 next 페이지로 이동할 수 있는 버튼을 클릭하는 것이다. 즉, 버튼 태그를 클릭한다.
- 버튼은 ul > li > span > a 형태로 들어간다는 것을 확인할 수 있다.
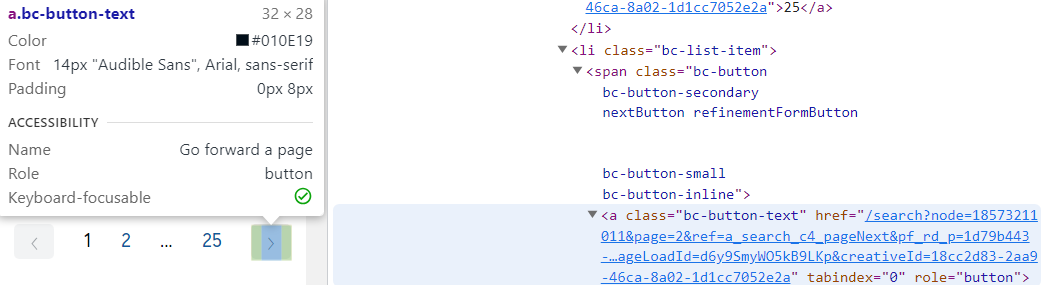
- 이를 xpath로 구현하면 다음과 같다.
//ul[contains(@class, "pagingElements")]//span[contains(@class, "nextButton")]/a/@href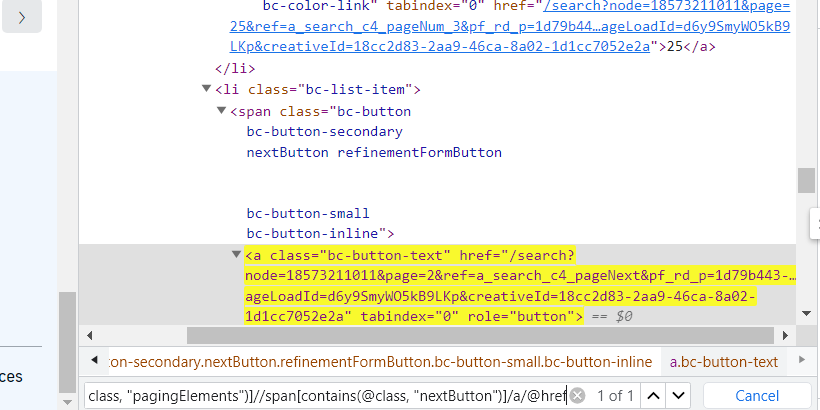
- 이제 코드로 구현한다.
import scrapy class AudibleSpider(scrapy.Spider): name = "audible" allowed_domains = ["www.audible.com"] start_urls = ["https://www.audible.com/search"] def parse(self, response): product_container = response.xpath('//div[@class="adbl-impression-container "]/div/span[2]/ul/li') for product in product_container: book_title = product.xpath('.//h3[contains(@class, "bc-heading")]/a/text()').get() # 몇몇 도서의 저자는 2명이기도 하다. book_author = product.xpath('.//li[contains(@class, "authorLabel")]/span/a/text()').getall() # 책의 길이 book_length = product.xpath('.//li[contains(@class, "runtimeLabel")]/span/text()').get() yield { 'title' : book_title, 'author' : book_author, 'length' : book_length } pagination = response.xpath('//ul[contains(@class, "pagingElements")]') next_page_url = pagination.xpath('.//span[contains(@class, "nextButton")]/a/@href').get() if next_page_url: yield response.follow(url=next_page_url, callback=self.parse)- 코드가 완성이 되었다면, 이제 scrapy 명령어로 csv 파일까지 출력한다.
scrapy crawl audible -o audible_multiplepage.csv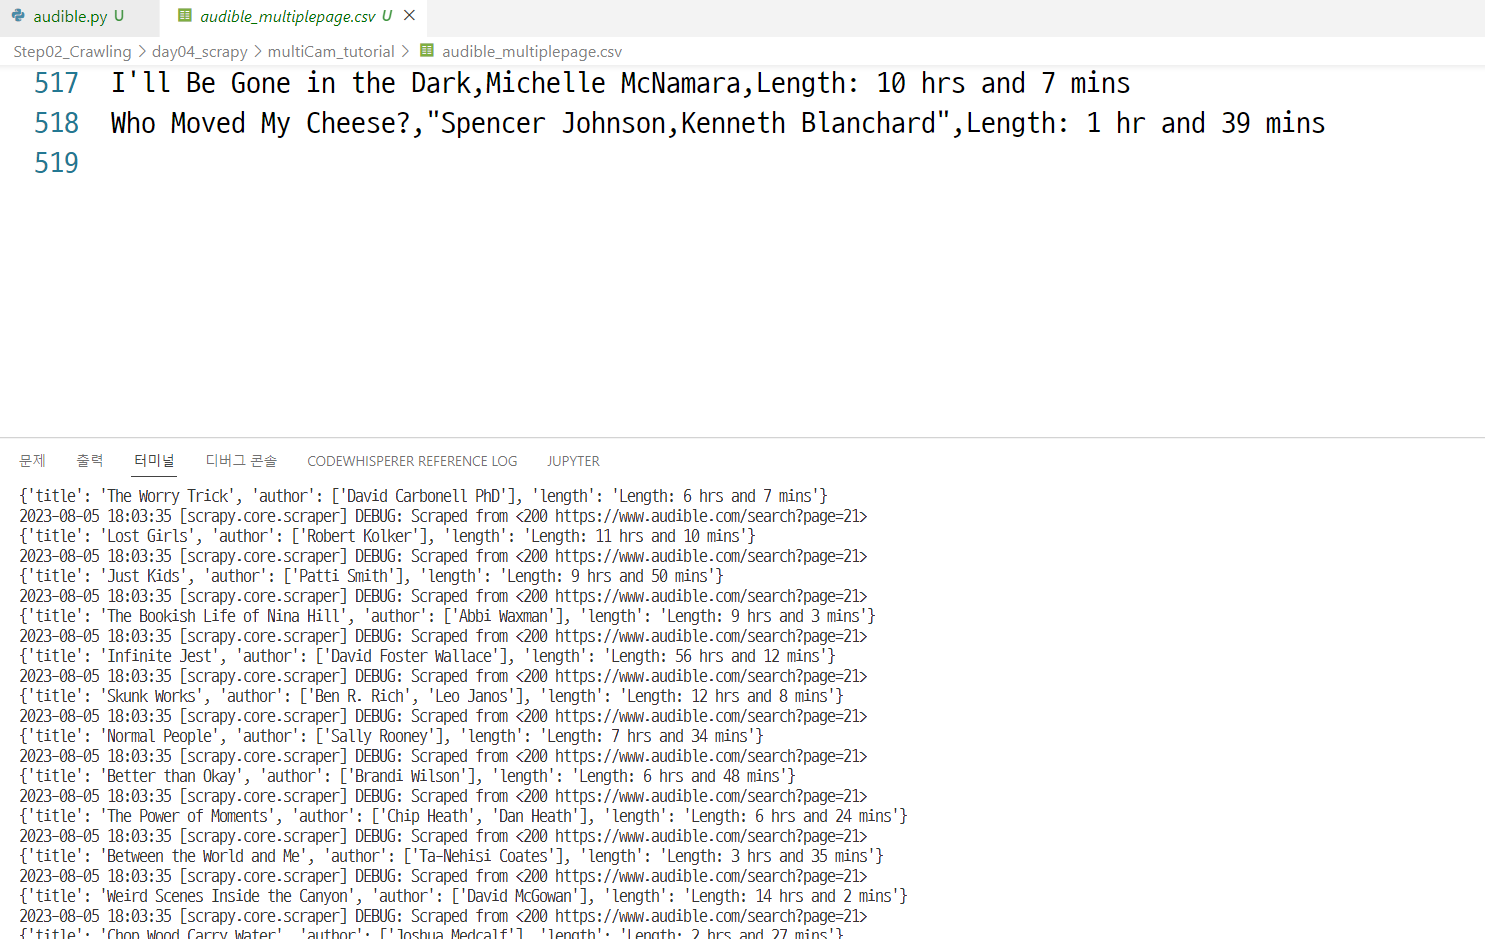
User Agent 변경
User-Agent를 변경하도록 한다.
- 파일 변경은 settings.py에서 한다.
- 기존
# Override the default request headers: #DEFAULT_REQUEST_HEADERS = { # "Accept": "text/html,application/xhtml+xml,application/xml;q=0.9,*/*;q=0.8", # "Accept-Language": "en", #}- 수정
# Override the default request headers:
#DEFAULT_REQUEST_HEADERS = {
#    "Accept": "text/html,application/xhtml+xml,application/xml;q=0.9,*/*;q=0.8",
#    "Accept-Language": "en",
#}

DEFAULT_REQUEST_HEADERS = {'User-Agent':'Mozilla/5.0 (Windows NT 10.0; Win64; x64) AppleWebKit/537.36 (KHTML, like Gecko) Chrome/115.0.0.0 Safari/537.36'}
이후 audible.py를 수정한다.
import scrapy

class AudibleSpider(scrapy.Spider):
    name = "audible"
    allowed_domains = ["www.audible.com"]
    # start_urls = ["https://www.audible.com/search"]

    def start_requests(self):
        yield scrapy.Request(
            url = 'https://www.audible.com/search',
            callback=self.parse,
            headers={'User-Agent':'Mozilla/5.0 (Windows NT 10.0; Win64; x64) AppleWebKit/537.36 (KHTML, like Gecko) Chrome/115.0.0.0 Safari/537.36'}
        )

    def parse(self, response):
        product_container = response.xpath('//div[@class="adbl-impression-container "]/div/span[2]/ul/li')

        for product in product_container:
            book_title = product.xpath('.//h3[contains(@class, "bc-heading")]/a/text()').get()

		    # 몇몇 도서의 저자는 2명이기도 하다.
            book_author = product.xpath('.//li[contains(@class, "authorLabel")]/span/a/text()').getall()

            # 책의 길이
            book_length = product.xpath('.//li[contains(@class, "runtimeLabel")]/span/text()').get()

            yield {
                'title' : book_title,
                'author' : book_author,
                'length' : book_length,
                'User-Agent' : response.request.headers['User-Agent'] # 테스트 보여주기용
            }

        pagination = response.xpath('//ul[contains(@class, "pagingElements")]')
        next_page_url = pagination.xpath('.//span[contains(@class, "nextButton")]/a/@href').get()

        if next_page_url:
            yield response.follow(
                url=next_page_url,
                callback=self.parse,
                headers={'User-Agent':'Mozilla/5.0 (Windows NT 10.0; Win64; x64) AppleWebKit/537.36 (KHTML, like Gecko) Chrome/115.0.0.0 Safari/537.36'})
(추가 공부 XPath)
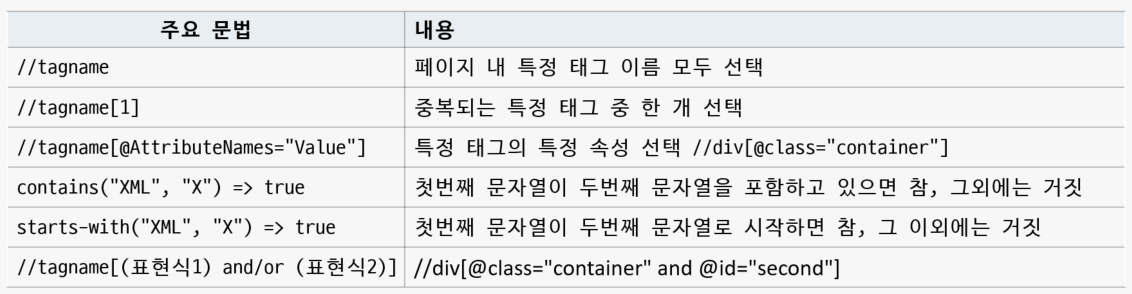
- Xpath(XML Path Language)
- XML 문서에서 정보를 탐색하고 추출하는 데 사용되는 쿼리 언어
- XML 트리에서 작동 경로와 유사한 구문 사용
- 참조
- https://www.w3schools.com/xml/xpath_syntax.asp
- Xpath Playgroud : https://scrapinghub.github.io/xpath-playground/
- Xpath CheetSheet : https://devhints.io/xpath